You’ve shampooed the floor carpet twice. You’ve hit it with baking soda. You’ve sprayed half a bottle of fabric freshener. The car smells fine — until a humid afternoon turns your vehicle into a rolling ammonia cloud. This is not a cleaning failure. It is a chemistry failure. Understanding why uric acid behaves differently from every other organic stain will change how you approach this job permanently.
Key Takeaways
- Uric acid crystals do not dissolve in water or alkaline soap — they require enzymatic digestion to be neutralized. Scrubbing harder with conventional shampoo moves the problem around; it does not eliminate it.
- Humidity is the trigger. Dormant uric acid crystals reactivate when moisture is introduced, releasing ammonia gas directly into the cabin air. This is why the smell returns on rainy days or after a car wash.
- Bio-enzymatic cleaners need 12–24 hours of dwell time in a damp environment to fully digest the proteins and uric acid compounds. Rushing this step is the single biggest reason treatments fail.
The Real Reason Shampoo Cannot Touch Uric Acid
Most automotive carpet shampoos are either water-based surfactant formulas or alkaline cleaners. Both work on the same principle: lift a substance off a surface and suspend it in water so it can be blotted or extracted away.
This works perfectly on food spills, mud, and even most biological fluids like saliva or blood. Uric acid is the exception.
When urine dries, the urea and water components evaporate. What stays behind are uric acid crystals. These crystals bond tightly to carpet fibers at a molecular level and are chemically insoluble in standard water. Alkaline soaps — including the heavy-duty ones with enzymes marketed for general carpet use — cannot break the molecular structure of uric acid. They can dilute the surrounding residue, temporarily suppress odor, and clean everything else in the stain. The crystals stay.
This is not a concentration issue. You cannot out-scrub a chemistry problem.
The reactivation cycle makes it worse. Every time moisture — rain, a damp floor mat, spilled coffee, even high ambient humidity — contacts those dormant crystals, they partially dissolve and off-gas ammonia. To someone sitting inside the car, this registers as a sudden, sharp urine smell that seems to come from nowhere. It came from chemistry.
What Enzymatic Cleaners Actually Do
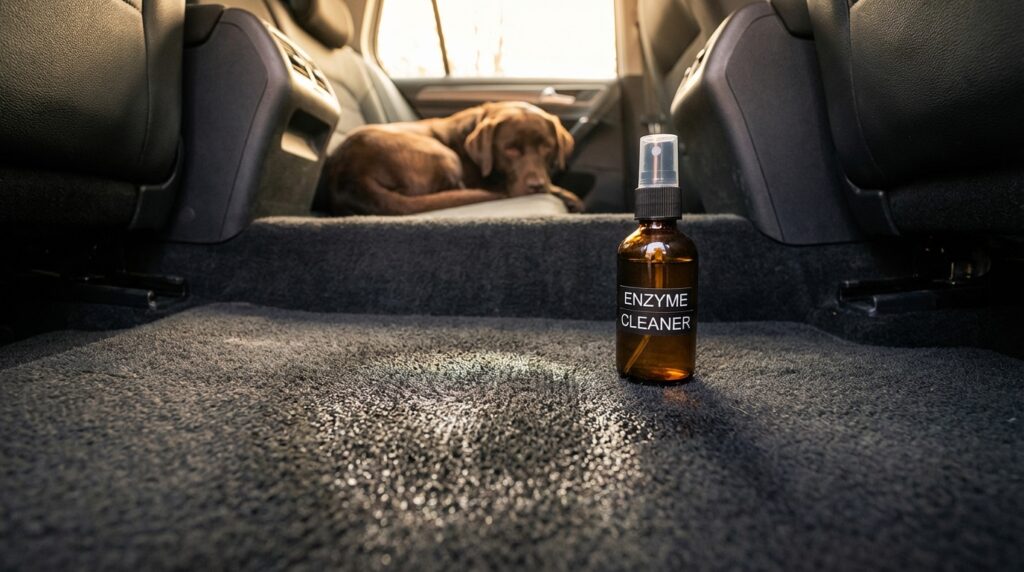
Bio-enzymatic cleaners work on a fundamentally different mechanism. They contain live colonies of bacteria that produce specific enzymes — primarily uricase and protease — engineered to target uric acid compounds and the proteins left in biological waste.
The process is digestion, not dissolution.
The bacteria consume the uric acid crystals as a food source. The enzymes break the crystalline structure down into simpler compounds — primarily carbon dioxide and water — that can be safely extracted or that evaporate without odor. Once the food source is gone, the bacterial colony dies off naturally.
This is why dwell time is non-negotiable. The bacteria need 12–24 hours in a damp environment to complete the digestion cycle. The carpet must remain moist — not soaked, but consistently damp — throughout that window. If the product dries before the process finishes, the bacteria become inactive before the job is done.
Heat kills the bacteria. This rules out steam cleaning during or immediately after enzymatic treatment. It also means you should not apply enzymatic cleaner to a car that has been sitting in direct sunlight with a hot interior.
Conventional Products vs. Bio-Enzymatic Cleaners: A Direct Comparison
| Feature | Traditional Carpet Shampoo | Bio-Enzymatic Cleaner |
|---|---|---|
| Uric acid crystal removal | No — crystals remain | Yes — bacteria digest the crystals |
| Odor mechanism | Masks or suppresses odor | Eliminates the odor source |
| Dwell time required | 5–15 minutes | 12–24 hours |
| Humidity sensitivity | Not applicable | Requires damp environment during dwell |
| Safe with steam cleaner | Yes | No — heat kills active bacteria |
| Reactivation risk after treatment | High | Low to none if fully digested |
| Required application temperature | Any | Avoid extreme heat or cold |
How to Treat Pet Urine Contamination in Automotive Carpet Correctly
Step 1: Extract the Loose Material First
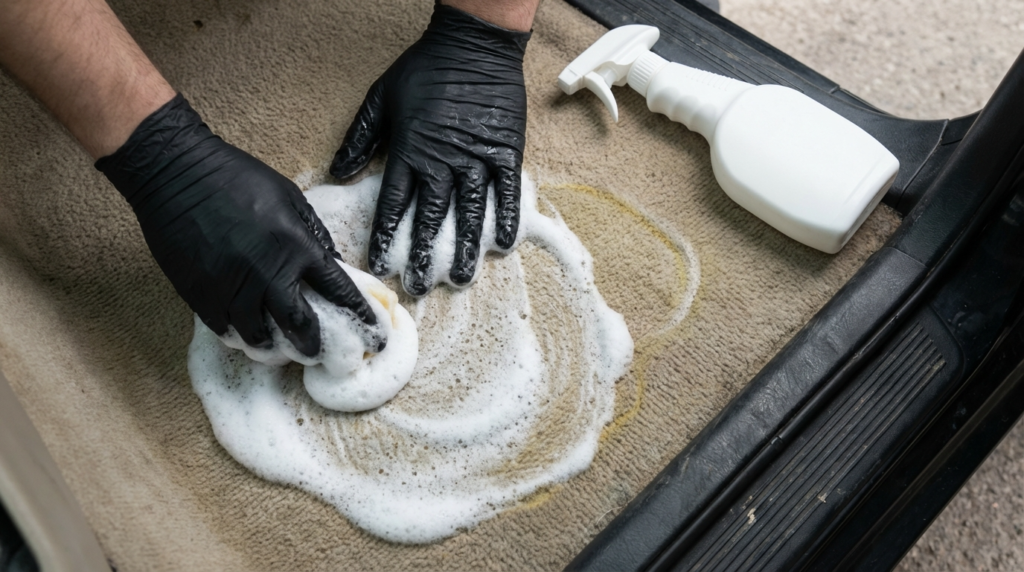
Before any enzymatic cleaner touches the carpet, extract as much of the residual contamination as possible. Use a wet/dry vacuum to pull out any moisture. If the stain is old and dry, this step is less critical, but you still want a clean surface.
Do not pre-treat with any shampoo, alkaline cleaner, or steam at this stage. Both will interfere with the enzymatic process that comes next.
Step 2: Locate the True Contamination Zone
This is where most people get it wrong. What you see on the surface of the carpet is only part of the contamination.
Urine wicks. In automotive carpet — which typically has a carpet layer over a foam backing and a rubber or plastic subfloor — urine travels downward and outward from the visible stain. In a soaking incident, you may have significant contamination in the backing and foam that is completely invisible from the surface.
The biggest mistake I see beginners make in the shop is treating only the visible stain and wondering why the smell persists. When you peel back a car carpet that has had repeated urine exposure, the foam backing underneath is often dark yellow and saturated. The carpet looked clean. The backing was the problem the whole time.
If the contamination is severe, you need to lift the carpet section and treat the foam backing and subfloor separately. For mild to moderate staining, saturation from the top down — applying enough product to reach the backing — is the practical alternative.
Step 3: Apply the Enzymatic Cleaner Correctly
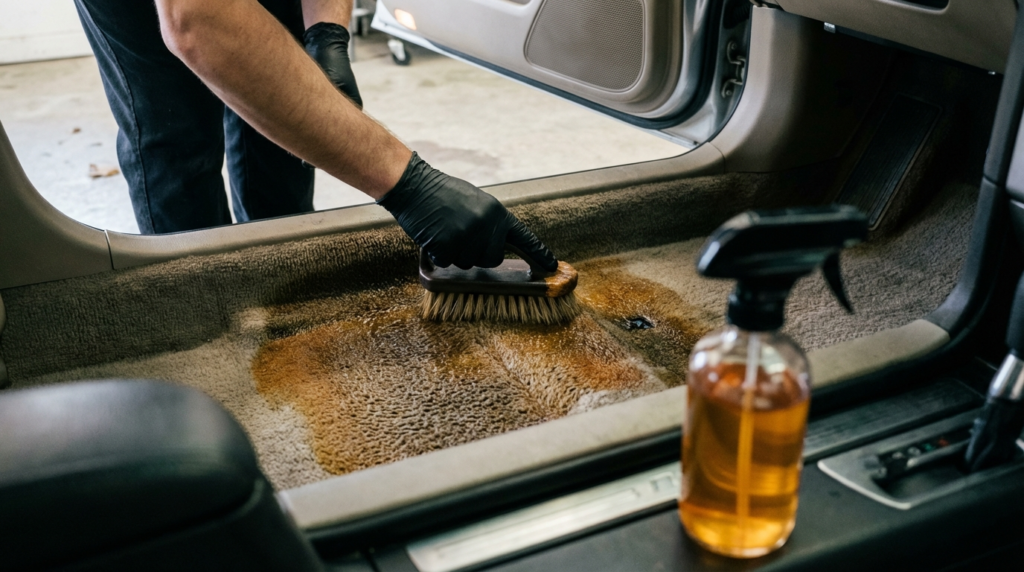
Saturate the affected zone generously. The product needs to penetrate to the same depth as the contamination. Work the cleaner into the carpet fibers with a stiff brush to ensure contact with the crystalline deposits.
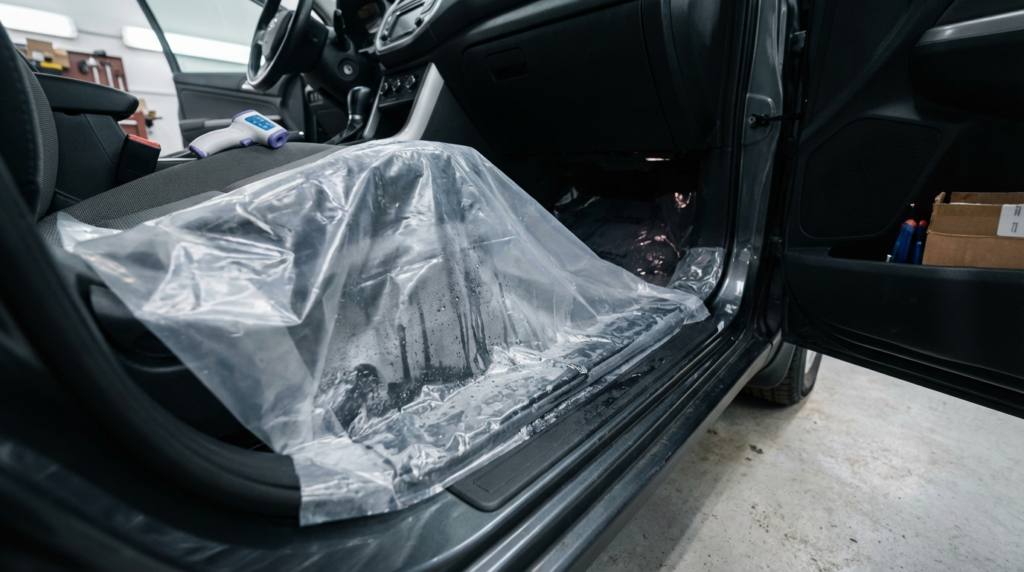
The carpet must remain damp for the full dwell period. In most garage conditions, you will need to cover the treated area with plastic sheeting to prevent evaporation. This traps humidity and keeps the bacterial environment active.
Check the treated area at the 6-hour mark. If the surface feels dry, mist lightly with plain water and re-cover. The bacteria die in a dry environment.
Step 4: Dwell Time and Environment
Leave the treatment undisturbed for a minimum of 12 hours. In cases of heavy or repeated contamination — a dog that urinated in the same spot multiple times — extend to 24 hours.
Ambient temperature matters. Most bio-enzymatic formulas are calibrated for 50–85°F (10–29°C). A cold garage in winter will slow bacterial activity significantly. A car baking in summer sun may kill the bacteria before they complete digestion. Work in a shaded, temperature-controlled space when possible.
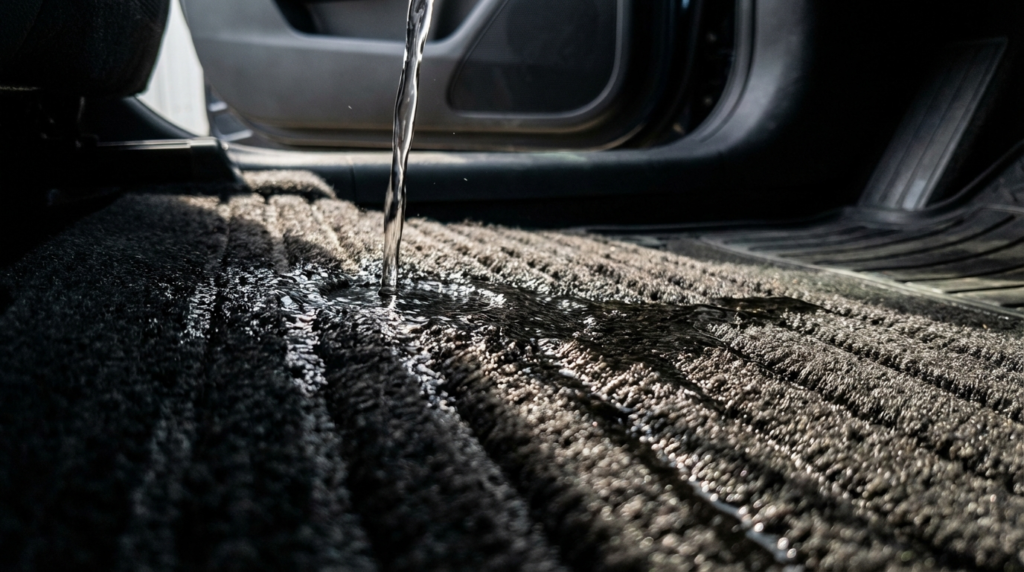
Step 5: Extract and Dry Completely
After the dwell period, extract the liquid thoroughly with a wet/dry vacuum. Follow immediately with a carpet extractor if you have access to one. Rinse the treated area with clean water — no shampoo — and extract again.
Now you can use heat. A shop fan or portable heater directed at the carpet will accelerate drying. Incomplete drying after treatment creates a warm, damp environment that can support mold growth, which introduces a different odor problem.
Pro/Con: Lifting the Carpet vs. Treating In-Place
| Approach | Pros | Cons |
|---|---|---|
| Treat in-place (top-down saturation) | Faster, no disassembly, works well on mild staining | May not reach backing contamination on heavy soaking |
| Lift carpet and treat separately | Direct access to backing and subfloor, most thorough result | Time-intensive, risk of damaging clips or fasteners, requires full dry-out before reinstall |
Specific Situations That Change the Protocol
Old, dried stains from an unknown source: These require the same process, but pre-dampen the carpet with plain water before applying the enzymatic cleaner. This partially reactivates the crystals and makes them more accessible to the enzymes. Without this step, the crystalline surface can be less permeable to the bacterial formula.
Vehicles with rubber floor mats over carpet: The mat traps humidity underneath and accelerates contamination of the backing. Remove and treat the mat independently. Rubber mats are not porous, so standard cleaning applies — the enzymatic process is for the carpet and backing beneath.
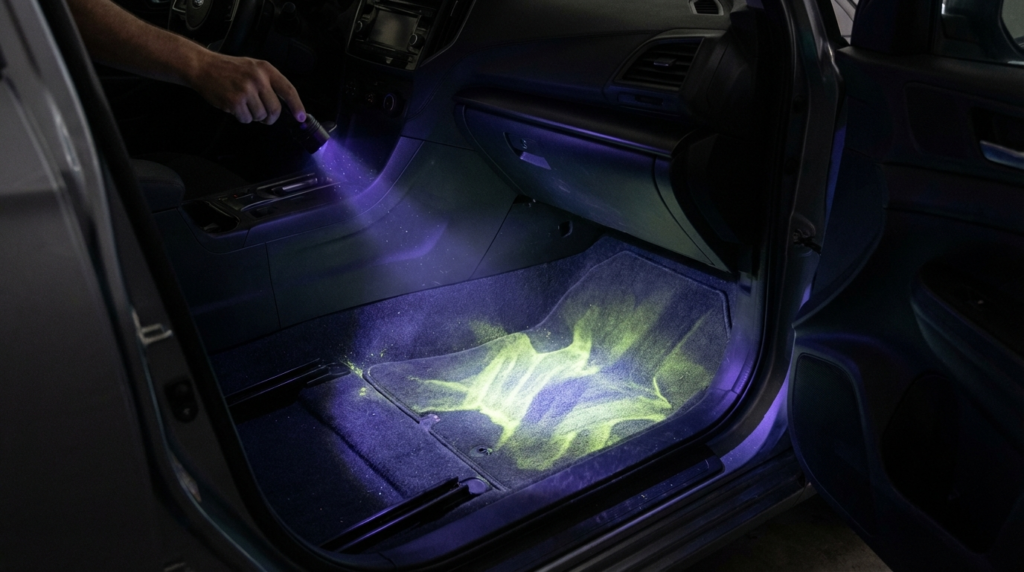
Dark interior carpets that hide staining: Use a UV/blacklight in a dark environment before treatment. Uric acid fluoresces under UV light. This gives you an accurate map of the actual contamination zone, not just the visible outline.
FAQs
Can I use an enzymatic cleaner right after a steam cleaning?
No. Steam heat neutralizes the live bacteria in the enzymatic formula before they can complete digestion. Run the enzymatic treatment first, complete the full dwell period, extract, dry the carpet fully, and then steam if you want to follow with a steam clean for finishing.
How do I know if the enzymatic treatment actually worked?
The smell test under humidity is the most reliable field test. After the carpet is completely dry, mist the treated area lightly with water and let it sit for five minutes. If the ammonia odor returns, the treatment is incomplete — either the dwell time was insufficient or the contamination reached deeper into the backing than the product penetrated.
Why does my car smell worse right after I apply the enzymatic cleaner?
The initial application partially dissolves dormant uric acid crystals, releasing a burst of ammonia gas before the bacteria complete digestion. This is normal and temporary. Keep the area sealed and allow the full dwell period to complete. The smell should resolve as the bacterial process finishes.
Is one application always enough for severe contamination?
Not always. Heavy or repeated contamination — especially where urine has soaked through to the subfloor — may require two treatment cycles. After the first treatment and full dry-out, run the UV light again. If you still see fluorescence, repeat the protocol. Cutting corners on the second application will produce the same partial result as the first.
Your Next Step Right Now
Pull the floor mats out of the vehicle today and run a UV light over the carpet in a darkened space. Most pet owners are surprised — and a little alarmed — by what they find beyond the visible stain. Once you have an accurate map of the actual contamination zone, you can size the job correctly and buy enough enzymatic product to saturate the full area including the backing depth. That mapping step costs nothing and prevents the most common failure: treating 30% of the problem and wondering why the smell keeps coming back on humid days.