If you’ve ever tried to grow herbs on a windowsill or tomatoes under a grow light, you’ve probably asked the same question I did: “Is this enough light?” For the longest time, my answer was just a shrug. My basil got leggy, my tomatoes flowered but never set fruit, and I was constantly frustrated. I thought “bright light” was a simple, visual thing. I was wrong. The single biggest change in my indoor gardening success came when I stopped guessing about light and started measuring it.
Hi, I’m Priya. My journey into smart gardening started about five years ago, right in my small apartment, trying to figure out why my “full spectrum” light wasn’t growing full plants. This frustration sent me down a deep rabbit hole of light science, sensors, and automation. I’ve spent these past few years testing, tinkering, and—frankly—failing a lot. But all that trial and error helped me learn what actually works. My goal here is to share what I’ve learned in a way that skips the dense scientific jargon and gets right to the practical steps that will help your garden thrive.
What’s the Big Deal with Light, Anyway?
When we start, we all tend to judge light with our eyes. If it’s bright and hurts to look at, it must be good, right? That was my first mistake. I bought a cheap LED panel from Amazon that looked incredibly bright, but my plants just kept stretching, desperate for more.
Here’s the thing: our eyes and plants see “light” in completely different ways. Our eyes are most sensitive to green and yellow light. This is why a typical office “lux” meter, or even your phone’s light sensor, is great for telling you if a room is bright for a human.
Plants, however, couldn’t care less about green light (they reflect it, which is why they look green!). They power their growth using a specific range of blue and red light. This “plant-usable” light is called Photosynthetically Active Radiation, or PAR.
Think of it like this:
- Lumens (what we see): This is like the total noise level in a room.
- PAR (what plants use): This is the specific language being spoken.
A room can be very loud (high lumens) but if it’s all in a language your plant doesn’t understand (like mostly green light), it’s useless for growth. A grow light is designed to speak the plant’s language—to be rich in PAR.
Decoding the Lingo: PAR, PPFD, and DLI
Okay, we know PAR is the type of light we need. But how do we measure it? This is where two more acronyms come in, and I promise they’re the last ones you really need to know.
What is PAR (Photosynthetically Active Radiation)?
As I mentioned, this isn’t a measurement but a definition. It’s the range of the light spectrum (from 400nm to 700nm) that plants use for photosynthesis. When you buy a “full-spectrum” grow light, the manufacturer is claiming it provides light across this entire range. A good light sensor is the only way to call its bluff.
What is PPFD (Photosynthetic Photon Flux Density)?
This one sounds complicated, but the concept is simple. PPFD is the amount of PAR that hits a specific spot on your plant each second.
- The unit: µmol/m²/s (micromoles per meter squared per second).
- A simple analogy: If PAR is the food (light), PPFD is the speed you’re delivering that food.
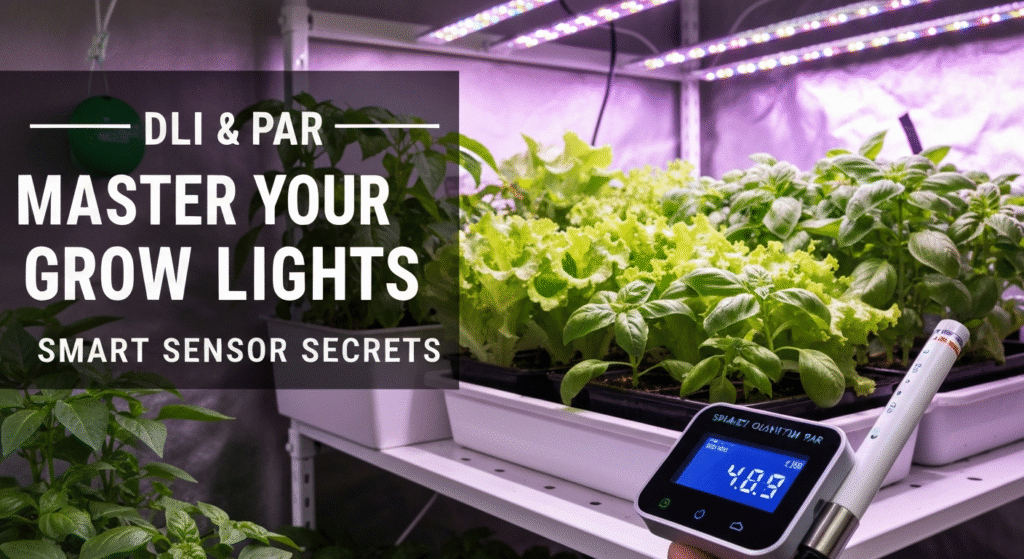
When I got my first real sensor, I measured the PPFD from my “bright” LED light. At the plant’s canopy, it was a dismal 75 µmol/m²/s. My herbs were starving. For comparison, leafy greens are happy around 200-300 µmol/m²/s. Measuring PPFD was my first “aha!” moment. It’s an instant snapshot of your light’s intensity at a specific point.
But intensity is only half the story.
The Game Changer: Understanding DLI (Daily Light Integral)
This is it. If you learn only one concept, make it this one. Daily Light Integral (DLI) is the total amount of PAR your plant receives over a 24-hour period.
What is DLI?
PPFD is the speed of light delivery; DLI is the total portion size for the whole day.
You can get to the same DLI in two ways:
- High PPFD (intense light) for a short time (e.g., 8 hours).
- Medium PPFD (gentler light) for a long time (e.g., 16 hours).
This is why DLI is the master metric. It combines light intensity (PPFD) and duration (your light timer) into a single, powerful number. The unit for DLI is moles/m²/day.
Why DLI Matters More Than PPFD
I used to obsess over having the highest PPFD. I cranked my new light up and bleached the tips of my lettuce. I was force-feeding them. My “aha!” moment #2 was realizing that plants, like people, prefer a steady, all-day meal, not a single, scorching-hot blast.
By measuring PPFD and setting my timer, I could calculate my DLI. I learned my basil didn’t need a super-intense light; it needed a consistent 16-hour day to get the total amount of energy it craved. This concept is the gold standard in professional horticulture, as explained by researchers at Utah State University Extension.
The math is simple:
DLI = (PPFD x Photoperiod in hours x 3600) / 1,000,000
Don’t worry, you don’t have to do that math. A good smart sensor app does it for you. You just plug in your PPFD reading and your photoperiod (e.g., “16 hours”), and it tells you your DLI.
Target DLI for Common Indoor Plants
So, what’s a good DLI? It depends entirely on what you’re growing. Fruiting plants like tomatoes are light-hungry. Simple lettuce is not.
Here’s a general guide I’ve built from my own tests and research.
| Plant Type | Target DLI (mol/m²/day) | My Personal Experience |
| Seedlings | 5 – 10 | I aim for 8-10. Less than 5 and they get leggy very fast. |
| Lettuce & Leafy Greens | 12 – 17 | My sweet spot for basil, mint, and lettuce is around 15. |
| Common Houseplants | 5 – 15 | Varies wildly. My Pothos is happy at 4-6, but my Fiddle Leaf Fig wants 10+. |
| Tomatoes & Peppers | 20 – 30+ | This is where it gets serious. You need strong lights to get a DLI of 25+ to produce good fruit. |
Priya’s Note: This table is a fantastic starting point, but it’s not gospel. I’ve found my ‘Genovese’ basil likes a slightly higher DLI (around 16-17) than my ‘Thai’ basil. Use this as your baseline, take notes, and see how your specific plants respond.
Why Your Phone App Isn’t Good Enough
“But Priya, there’s an app for that.” I hear this all the time, and I need to be blunt: phone light sensor apps are not designed for grow lights.
I tried them. I promise. I spent a year trying to make free “lux meter” and “PAR meter” apps work. They were wildly inconsistent.
Here’s the problem:
- They measure Lumens/Lux: As we covered, this measures brightness for humans, which is heavy in green light.
- They can’t read the spectrum: A grow light might be 50% red light. Your phone sensor sees this red light very differently than a true PAR sensor, throwing its “calculation” off by as much as 50-70%.
- Plastic filters: The filter over your phone’s sensor is designed for photography, not scientific measurement.
Using a phone app to measure your grow light is like trying to measure a cup of flour with a ruler. It’s the wrong tool for the job. It gave me bad data, which led to bad decisions and leggy plants.
Choosing Your Tool: The Smart Light Sensor
This is where I finally bit the bullet and invested in my garden. A real light sensor is called a quantum sensor. It’s specifically designed to count the photons in the PAR spectrum.
What is a Smart Light Sensor?
A basic quantum sensor gives you a PPFD reading on a little screen. A smart quantum sensor connects to your phone or Wi-Fi. This is where the magic happens.
- It measures PPFD accurately.
- The app logs your readings.
- The app automatically calculates DLI for you.
- It allows you to map your garden and save different “light recipes.”
Features That Matter (From My Experience)
After trying a couple of different models, here’s what I’ve learned to look for:
- A True Quantum Sensor: This is non-negotiable. The product description must say it measures PAR or PPFD. If it only says “Lux” or “Lumens,” it’s the wrong tool.
- DLI Calculation: The app should do the DLI math for you. This is the single biggest time-saver and the main reason to get a smart sensor.
- Data Logging: I love being able to look back at a chart of my garden’s light. It helps me see if my timer failed or if an LED light is starting to dim over time.
- Connectivity (Wi-Fi vs. Bluetooth): Bluetooth is fine for spot checks. Wi-Fi is more powerful if you want to get into automation, as it can stay connected to your home network.
Sensor Type Comparison
To put it all in perspective, here’s a quick breakdown of the tools.
| Tool | What It Measures | Accuracy (for PAR) | Cost | Best For… |
| Phone App | Lux (Human Brightness) | Extremely Low | Free | Absolutely nothing related to grow lights. |
| Analog Lux Meter | Lux (Human Brightness) | Very Low | $ | Testing if your office lights are on. |
| Quantum Sensor | PPFD | High | $$$ | Professionals and serious hobbyists taking spot readings. |
| Smart Quantum Sensor | PPFD (and calculates DLI) | High | $$$ | Serious hobbyists who want to track, log, and perfect their DLI. |
My Two Cents: I know the price of a real quantum sensor can be a shock. My advice? Don’t waste money on a cheap lux meter first, like I did. It’s false economy. Save up for a proper smart sensor. It is the one tool that pays for itself in better harvests, less-stressed plants, and zero guesswork.
How I Use My Smart Sensor: A Step-by-Step Guide
Getting the tool is step one. Using it to get actionable data is step two. Here is the exact process I follow every time I set up a new grow tent or shelf.
Step 1: Set Up Your Garden
Before you measure, get everything in place. Hang your light, put your pots or trays where they will live, and set your light timer (e.g., 16 hours on, 8 hours off). Turn the light on.
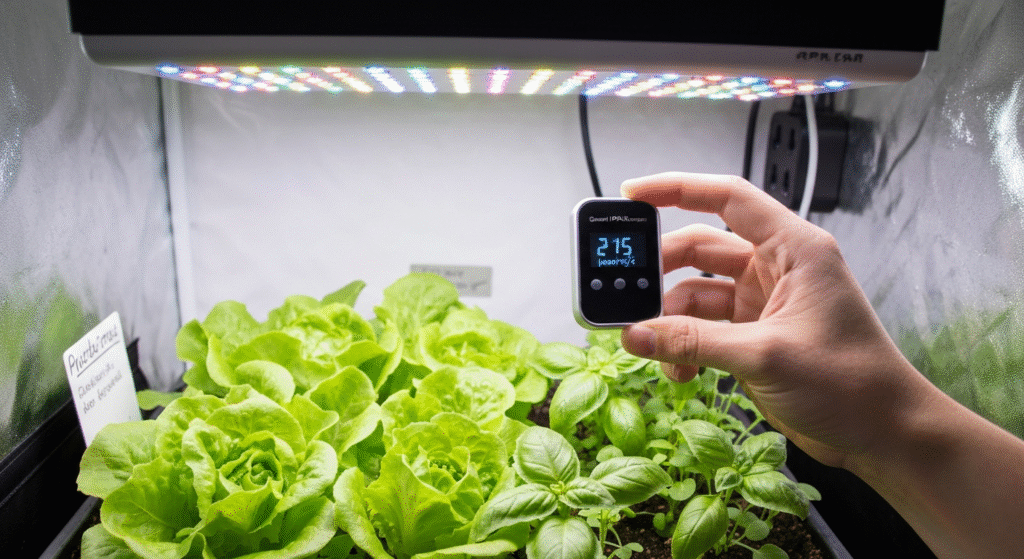
Step 2: Take Your First PPFD Reading (Canopy Level)
Hold the sensor at the canopy level. This means holding it right where the top-most leaf of your plant will be. This is your most important reading.
- I place an empty pot on my tray to get the height right.
- I hold the sensor flat, pointing up at the light.
- My goal for new lettuce seedlings is to get a reading of around 200-250 µmol/m²/s.
Step 3: Adjust Your Light Height
Is your reading too high? Raise the light. Too low? Lower it.
This is the “dialing in” process. I move my light (most of mine are on adjustable rope ratchets) up or down an inch at a time, wait a second for the sensor to update, and check the reading again. I keep adjusting until that center-spot reading is right at my target PPFD.
Step 4: Map Your Light “Footprint”
This is the step most people skip, and it’s critical. Don’t just measure the spot directly under the light. Your light is not perfectly even.
- I take a reading in the center.
- I take readings at the four corners of my grow tray.
- I take readings at the four edges.
I was shocked when I first did this. My center reading was 220, but my corners were getting only 90! This is why my plants on the edges always grew slower. This “light map” told me my light’s true effective footprint was smaller than the manufacturer claimed.
Step 5: Calculate Your DLI
Now for the payoff. I open my sensor’s app. I take my average PPFD (or sometimes I just use the center reading as my main target). Let’s say my average PPFD is 200.
I plug these two numbers into the app:
- PPFD: 200 µmol/m²/s
- Photoperiod: 16 hours
The app instantly does the math: Your DLI is 11.5 mol/m²/day.
I check my target DLI chart. For lettuce, 12-17 is the goal. I’m a little low. So, I have two choices:
- Lower the light slightly to increase the PPFD.
- Increase my timer to 17 or 18 hours.
I usually choose to extend the time. I set my timer for 17 hours, and my new DLI is 12.2. Perfect. I’m now confident my plants are getting the exact amount of food they need.
Common Problems I’ve Solved with My Sensor
This tool isn’t just for setup; it’s for troubleshooting. Here are real-world problems I’ve diagnosed and fixed using my sensor.
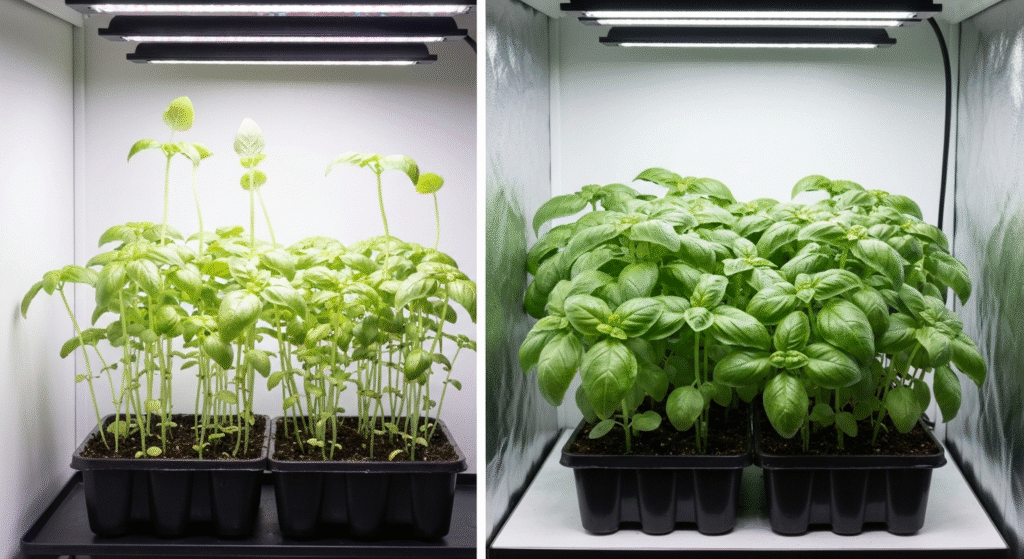
Problem 1: Leggy, Stretched Plants
- Symptom: My seedlings looked thin and were falling over, stretching for the light.
- Diagnosis: I placed the sensor at their level. My PPFD was fine (around 150), but my timer was only on for 12 hours. My DLI was only 6.5.
- My Fix: The plants were starving for total energy. I increased my timer to 18 hours. My new DLI was 9.7. Within three days, the new growth was stocky and strong.
Problem 2: Burnt or Bleached Leaf Tips
- Symptom: I got a powerful new light. The tips of my basil leaves started turning white and crispy.
- Diagnosis: I put the sensor at the canopy. The PPFD was over 550 µmol/m²/s! This was “light burn,” pure and simple. I was cooking them.
- My Fix: I raised the light 10 inches. This brought the PPFD down to a much gentler 300. My DLI was still high (around 19), but the intensity was no longer damaging. The new growth came in perfectly healthy.
Problem 3: Uneven Growth
- Symptom: The lettuce in the middle of my tray was huge. The plants at the edges were tiny.
- Diagnosis: My light map told the story. Center PPFD was 250. Corner PPFD was 80.
- My Fix: Lowering the light made the center too hot. Raising it made the corners too dark. The light’s footprint was just too small. I solved this by adding two small, cheap supplemental light strips along the long edges of my tray. This brought my corner PPFD up to 150 and evened out my whole canopy.
Connecting Sensors to Your Smart Home
This is where my 5+ years of tinkering with smart home tech really comes together with gardening. A “smart” sensor can often integrate with smart home platforms like Home Assistant, or through services like IFTTT (If This Then That).
This moves you from passive monitoring to active automation.
- Simple Automation: This is my favorite. I have an alert set up. If my sensor (which sits in my main grow tent) detects a PPFD of 0 during a time my lights are supposed to be on, it sends a push notification to my phone. This means the timer failed or the smart plug reset. This has saved my seedlings twice from an unexpected 48-hour blackout.
- Advanced Automation: You can create rules. “IF DLI for the day has reached 15, THEN turn off grow light.” This is great for saving energy, especially if you supplement with a sunny window. The sensor ensures the plant gets its 15 moles, whether it comes from the sun or the light, and then shuts the (expensive) light off.
- Pro-Level Dimming: The ultimate setup is to connect your sensor to a smart dimmer plug. You can set a target PPFD. If a cloud covers the sun, the sensor detects the drop and tells the dimmer to increase the grow light’s power. When the sun returns, it dims the light back down. This is how you lock in a perfectly consistent DLI, day after day.
Frequently Asked Questions (FAQs)
Do I really need a PAR sensor, or can I just follow the light manufacturer’s advice?
You don’t need one to grow, but you need one to stop guessing. Manufacturer-provided charts are often based on perfect, reflective-wall conditions. My measurements in a real-world setup have almost never matched the box. The sensor is for peace of mind and repeatable results.
What’s a good DLI to start with for beginners?
If I had to pick one number, it would be 12-15 mol/m²/day. This is a fantastic DLI for all seedlings, all leafy greens (lettuce, basil, mint, parsley), and many common houseplants.
Can I use a smart sensor for my houseplants in a window?
Absolutely! This is one of my favorite uses. I measure the DLI in my “sunny” south-facing window. On a clear summer day, it might be 20. On a cloudy winter day, it might only be 4. This tells me exactly which plants need supplemental light and which ones will be fine.
How often should I measure my lights?
I do a full “light map” measurement every time I set up a new shelf or change lights. After that, I’ll do a quick spot-check in the center about once a month, just to make sure the light’s output hasn’t dimmed over time (which older LEDs can do).
Final Thoughts
Moving from “this looks bright” to “I know my DLI is 14.5” was the single biggest leap in my indoor gardening journey. It took the guesswork, the frustration, and the luck out of the equation.
A smart light sensor—a true quantum PAR sensor—is the one piece of “pro” gear I believe every serious indoor gardener should own. It’s the “measuring cup” for the most important ingredient in your garden. It stops you from starving your plants (leggy growth) or burning them (bleached tips) and lets you dial in the exact recipe for a perfect, repeatable harvest. You’re no longer just a plant owner; you’re a light architect.