A greenhouse tent is a fantastic tool for an indoor gardener. It lets you create a perfect little microclimate. But here’s the hard truth: that small, enclosed space is also incredibly fragile. A heater failing overnight can freeze your seedlings. A fan stopping on a hot afternoon can cook your entire crop in hours. Guesswork just doesn’t work.
This is where smart alerts for temperature and humidity become your single most important insurance policy. They give you peace of mind and turn your tent from a high-risk gamble into a controlled, stable environment.
Hi, I’m Priya. My journey into smart gardening started about five years ago after a classic disaster. I lost an entire tent of beautiful basil and tomatoes to a sudden, silent heat spike caused by a fan failure. I was devastated. I decided right then that I would never let that happen again. I’ve spent the last few years obsessively testing and wiring up my own indoor garden setups, figuring out what tech works, what doesn’t, and how to explain it simply. I’m not an engineer, just a very determined gardener who has learned through a lot of trial and error.
Why You Can’t “Guess” Your Greenhouse Tent’s Climate
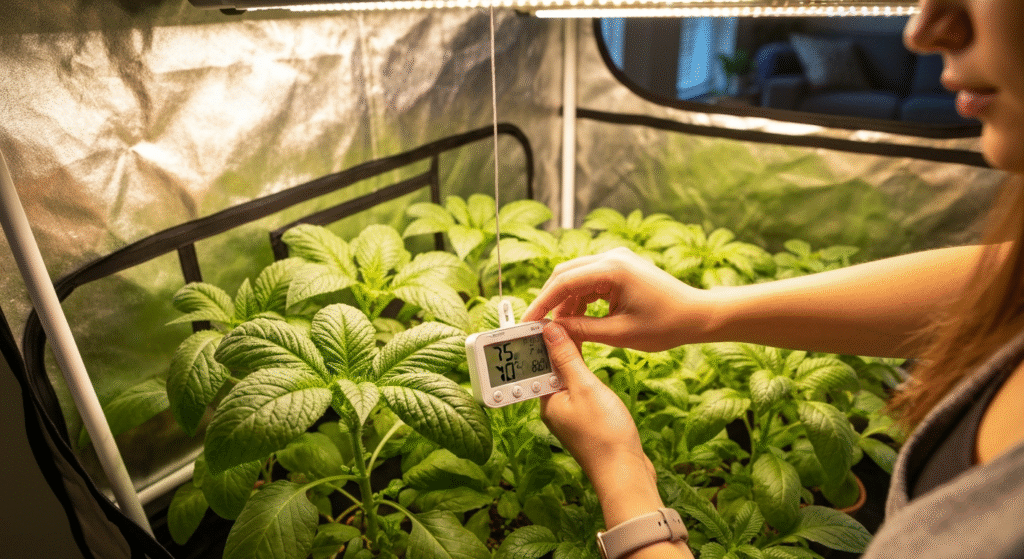
When I first started, I hung a simple analog thermometer inside my tent. I’d check it in the morning and again in the evening. The problem? I was completely blind to what happened during the other 22 hours of the day.
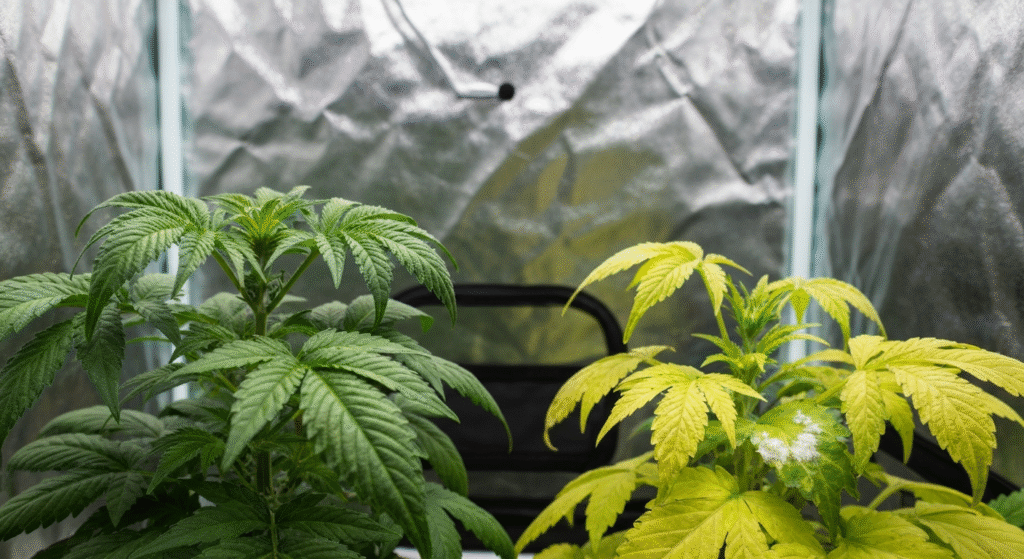
A greenhouse tent, especially a Mylar-lined one, doesn’t just get warm; it gets hot, fast. The temperature and humidity inside are in a constant battle, influenced by:
- Your grow lights: These are the biggest heat source.
- Your home’s environment: A cold night in your house means a cold tent.
- Ventilation: Are your fans running? Are the vents open?
- Plant transpiration: Your plants are constantly “breathing out” water vapor, which raises the humidity.
These factors can cause wild, dangerous swings.
The Dangers of an Unmonitored Tent
- High Temps: When temperatures soar above 85-90°F (29-32°C), most plants shut down. Their pores (stomata) close to save water. This stops growth and can quickly lead to “fried,” burnt, or wilted leaves.
- Low Temps: A dip below 50-60°F (10-15°C) can be just as bad. Cold air stunts growth, prevents nutrient uptake, and can kill tender plants or seedlings outright.
- High Humidity: This is a recipe for disaster. When humidity stays above 70-80% for too long, it creates the perfect breeding ground for mold, powdery mildew, and bud rot. The air is so damp, your plants can’t transpire properly.
- Low Humidity: Air that is too dry (below 40%) forces your plants to transpire too much. They pull up water from their roots at a frantic pace, which can lead to nutrient burn on the leaf tips.
Smart alerts solve this. They don’t just tell you the current reading; they yell for help the second your tent’s environment goes outside the safe zone you’ve defined.
The Core Components: What You Actually Need
Setting this up is surprisingly simple. You don’t need a complex, expensive system. It really just boils down to two or three items.
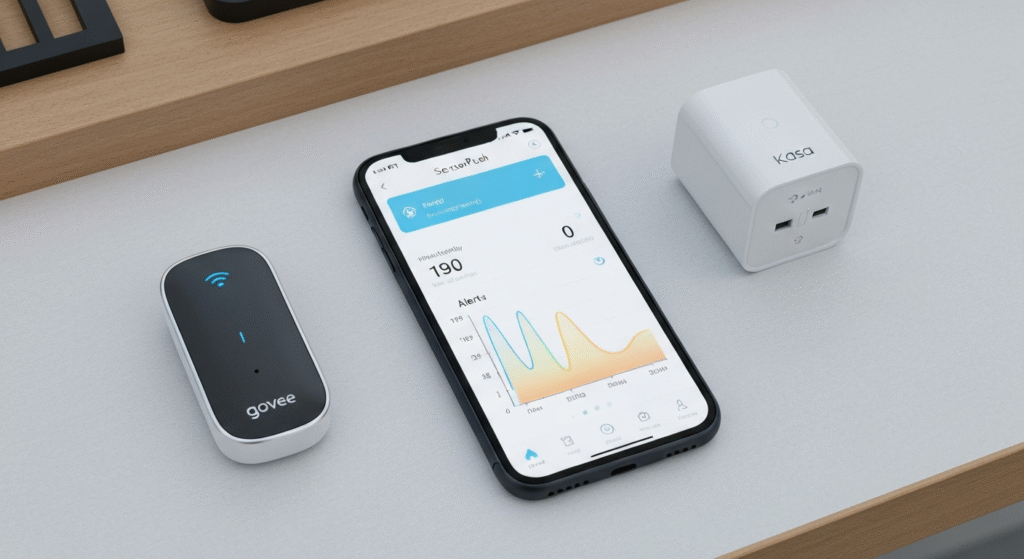
- A Smart Sensor: This is the “brain.” It’s a small, battery-powered device that reads both temperature and humidity (often called a “thermo-hygrometer”). The “smart” part means it can connect to your phone.
- An App: Every smart sensor comes with a free app for your phone. This is where you see the data and, most importantly, set up your alert rules.
- A “Hub” (Maybe): This depends on the type of sensor you buy. Many modern sensors don’t need a hub at all.
Choosing Your Smart Sensor (The “Brain”)
This is your most important decision. Smart sensors for home use generally come in three types. I’ve worked with all of them, and each has its place.
| Feature | Wi-Fi Sensors | Bluetooth Sensors | Zigbee / Z-Wave |
| How it Works | Connects directly to your home’s Wi-Fi router. | Connects directly to your phone. | Connects to a central smart home “hub.” |
| Alerts | Can send alerts to your phone anywhere in the world (as long as you have internet). | Can only send alerts when your phone is within Bluetooth range (e.g., 30-100 feet). | Can send alerts from anywhere, but relies on the hub. |
| Pros | True remote monitoring. This is the “peace of mind” option. | Very simple setup. Excellent battery life. | Extremely reliable. Low power. Great for advanced users. |
| Cons | Uses more battery than Bluetooth. Needs a good Wi-Fi signal at the tent. | Useless for alerts if you’re at work or on vacation. | Requires buying a separate hub (like SmartThings, Hubitat, or Home Assistant). |
| My Take | This is what I recommend and use. I started with Bluetooth, but the first time I was at dinner wondering if my tent was okay, I switched. I need to know about a problem before I get home, not after. | Good if your tent is in the same room you’re in, but that defeats the purpose of remote alerts. | This is the “pro” option. It’s fantastic if you already have a smart home hub, but it’s overkill for a beginner. |
For 99% of indoor gardeners, a simple Wi-Fi sensor is the way to go. Brands like Govee, SensorPush (with their Wi-Fi gateway), or Aqara (with their hub) are all popular and effective.
A Step-by-Step Guide to Setting Up Your Alerts
Let’s walk through the exact process. I’ll use a standard Wi-Fi sensor as the example, as it’s the most common and useful.
Step 1: Picking the Perfect Sensor
When you’re shopping, don’t just grab the cheapest one. Here’s what I look for:
- Wi-Fi Connectivity: This is non-negotiable for remote alerts. Make sure it’s 2.4Ghz Wi-Fi, as most home routers support this (and most sensors don’t use 5Ghz).
- High-Quality App: Read app reviews. Is the app easy to use? Does it offer data logging? A good app shows you a graph of your history, which is vital for spotting patterns.
- Good Battery Life: Most run on AA or AAA batteries. They should last at least 6 months to a year.
- Accuracy: Look for an accuracy of at least ±0.5°F and ±3% RH (Relative Humidity). This is more than enough for a garden.
Step 2: Ideal Sensor Placement Inside Your Tent
Where you put the sensor is critical. This is a mistake I made for months.
- DO NOT put it on the floor. Cold air sinks, so you’ll get false “low temp” readings.
- DO NOT hang it right under your grow light. You’ll get false “high temp” readings.
- DO NOT place it right in front of your intake fan or humidifier. It will only read the air from that one source.
The best spot: Hang your sensor at plant canopy level. This is where your plants are actually “living.” You want to measure the air they are experiencing. I use a simple string or zip tie to hang mine from one of the tent poles so it dangles in the open air, away from the tent walls and direct light.
Step 3: Connecting the Sensor to Its App
This is usually the easy part.
- Download the sensor’s official app (e.g., Govee Home).
- Create an account.
- Put the batteries in your sensor.
- Follow the in-app instructions to “Add Device.” This typically involves pressing a button on the sensor and selecting your home Wi-Fi network and password.
It should connect in a minute or two. You’ll see the current temperature and humidity show up right on your phone.
Step 4: Setting Your “Safe Zone” Thresholds
This is the most important step. In the app, you will find a “Settings” or “Alerts” section for your new sensor. This is where you tell the app what is “normal” and what is an “emergency.”
You need to set four alerts:
- High Temperature
- Low Temperature
- High Humidity
- Low Humidity
But what numbers should you use? This depends on your plants and their stage of growth. Here are some very safe, general-purpose ranges to start with.
| Plant Stage | Recommended Temp Range | Recommended Humidity Range |
| Seedlings / Clones | 70-80°F (21-27°C) | 60-70% |
| Vegetative Stage | 70-85°F (21-29°C) | 50-70% |
| Flowering Stage | 65-80°F (18-27°C) | 40-50% |
A quick note on this table: these are ideal zones. When setting your alerts, you want to set them just a little outside this ideal zone.
For example, if my plants are in the vegetative stage, I want the temp to be around 70-85°F. So, I would set my alerts like this:
- Low Temp Alert: Trigger if temp drops below 65°F
- High Temp Alert: Trigger if temp rises above 88°F
- Low Humidity Alert: Trigger if humidity drops below 45%
- High Humidity Alert: Trigger if humidity rises above 75%
This gives you a buffer. You don’t need a notification every time the temp hits 86°F for one minute. You want to be alerted when there’s a real problem. After running my tent for a few weeks and watching the data graphs, I found my plants were happiest around 78°F, so I slowly tightened my ranges.
Making Your Alerts Smarter: Beyond Basic Notifications
Getting an alert on your phone is great. It’s Step 1.
Step 2 is having your tent fix the problem for you. This is where the real magic of automation comes in.
To do this, you need one more piece of equipment: a Smart Plug.
A smart plug fits between your wall outlet and your “dumb” device (like a fan, heater, or humidifier). It connects to your Wi-Fi and lets you turn that device on or off from your phone… or, more importantly, lets other devices control it.
The Next Level: True Automation
Most smart sensor apps (like Govee) can now “talk” to their own smart plugs. But for maximum power, I run my automations through a central system like Amazon Alexa or Google Home. Both can connect to thousands of different brands.
Here is my exact setup. It’s simple, but it has saved my garden dozens of times.
- Exhaust Fan: My main exhaust fan is plugged into a Smart Plug.
- Small Heater: My small tent heater is plugged into a Smart Plug.
- Humidifier: My humidifier is plugged into a Smart Plug.
Then, in the Alexa app, I create “Routines” (Google calls them “Automations”). They follow a simple “If This, Then That” logic.
- High-Temp Failsafe:
- IF:
Greenhouse Sensortemperature rises above88°F. - THEN: Turn
Exhaust Fan Plugto ON.
- IF:
- Low-Temp Failsafe:
- IF:
Greenhouse Sensortemperature drops below65°F. - THEN: Turn
Heater Plugto ON. - (I also create a matching routine: IF temp rises above 70°F, turn Heater Plug OFF.)
- IF:
- Low-Humidity Failsafe:
- IF:
Greenhouse Sensorhumidity drops below45%. - THEN: Turn
Humidifier Plugto ON. - (And a matching routine: IF humidity rises above 55%, turn Humidifier Plug OFF.)
- IF:
Now, I don’t just get an alert about a problem. My tent automatically takes the first step to fix it, giving me plenty of time to get home and investigate the cause.
Common Problems and Quick Fixes
Setting this up isn’t always perfect the first time. Here are a few issues I ran into and how I fixed them.
“My Sensor Keeps Disconnecting!”
This is almost always a Wi-Fi signal problem. Your home Wi-Fi might be strong, but the Mylar-lined walls of a greenhouse tent are very good at blocking signals.
- The Problem: I had this exact issue. My sensor worked fine on a table next to the tent, but the second I zipped it up inside, it went offline.
- The Fix: I had to move the sensor. I now have it hanging just inside the tent’s mesh vent window, closest to my home’s router. This allows the signal to “leak” out without compromising the tent’s environment. If your signal is still too weak, you may need a simple Wi-Fi extender.
“I’m Getting Too Many False Alerts!”
This usually happens right after you water your plants. You open the tent, spray some water, and the humidity spikes, triggering your “High Humidity” alert.
- The Fix 1 (Widen Your Range): Your alert range might be too tight. If your “High Humidity” alert is 65%, try setting it to 75%. A short-term spike isn’t dangerous; a prolonged period of high humidity is.
- The Fix 2 (Use a Delay): Some advanced apps or smart home systems (like Home Assistant) let you set a delay. For example: “Only send an alert IF humidity is above 75% for more than 20 minutes.” This cuts out all those temporary false alarms.
“The Battery Drains Too Fast.”
If your sensor battery dies in a month, something is wrong. It’s usually one of two things:
- Weak Wi-Fi: The sensor is using all its power trying to “shout” at your router. Try the placement fix mentioned above.
- Reporting Frequency: In some apps, you can set how often the sensor “reports” new data. If it’s set to every 1 minute, the battery will drain. For a tent, a report every 10-15 minutes is more than enough.
My Top 3 Lessons Learned After 5 Years
- Data History is Your Best Teacher. The alerts are for emergencies. The history graph in your app is for learning. By looking at the graph, I spotted a pattern: my tent’s humidity was crashing every day at 2 PM. I realized it was when the sun hit that room and my home’s A/C kicked on, drying out the air. This data allowed me to pre-empt the problem.
- Simplicity Wins. You don’t need the most expensive, complicated system. A single $40 Wi-Fi sensor and a few $10 smart plugs can create a 99% effective automation system. Start simple.
- Waterproofing Matters (A Little). Tents are wet places. You’ll be misting, watering, and spilling. While you don’t need a sensor you can submerge in water, finding one that is “splash-resistant” or designed for humid environments is a very smart move.
Frequently Asked Questions (FAQs)
1. What’s the best sensor for a greenhouse tent?
The “best” one is a Wi-Fi sensor with a good app and reliable connection. I’ve had great personal success with Govee’s Wi-Fi-enabled sensors because their app is simple and integrates well with their smart plugs.
2. How accurate do these sensors need to be?
Don’t obsess over fractions of a degree. For gardening, an accuracy of ±0.5°F and ±3-5% humidity is perfectly fine. Consistency is more important than pinpoint scientific accuracy.
3. Can I use one sensor for multiple tents?
No. A greenhouse tent is a “microclimate.” The environment in one tent can be wildly different from another one right next to it. Each enclosed space needs its own sensor.
4. Do I need to pay for a subscription for alerts?
For 99% of brands (like Govee, Aqara, etc.), the app, data logging, and push notifications are completely free. Subscriptions are usually only for advanced features like unlimited data storage or SMS/voice call alerts, which you don’t need.
A Final Check-in On Your Tent’s New Brain
Setting up smart alerts is the single best upgrade you can make for your indoor garden. It’s your 24/7 guardian that watches over your plants when you can’t. It ends the guessing game and removes the anxiety of “what if.”
Gardening is about nurturing, and this technology is one of the best nurturing tools we have. It lets you stop being a worrier and get back to being a gardener, confident that your environment is stable and your plants are safe. If you’re looking to add a small heater to your tent for a low-temp automation, the Royal Horticultural Society (RHS) explains heating options and considerations in more detail.
