We’ve all been there. You have a beautiful indoor garden, your plants seem happy, and then one day you spot it: a tiny web. Or maybe a favorite leaf turns yellow, and you have no idea why. For the longest time, my plants were a source of both joy and low-key anxiety. I felt like I was always reacting to problems instead of catching them early. I wanted to know what was really going on when I wasn’t staring at them.
Hello, I’m Priya. My journey into smart indoor gardening started about five years ago when I nearly gave up on a prized Fiddle Leaf Fig. I was tired of finding pests too late and wondering if my plants were actually happy. This pushed me to obsessively test how smart home tech, especially simple cameras, could give us a closer look. I’m here to share what I’ve learned through a lot of trial, error, and some amazing time-lapses.
Using a plant camera might sound like an exaggeration, but it’s been one of the biggest game-changers for me. It’s not about just looking at your plants; it’s about observing them. It’s the difference between guessing and knowing. Let’s break down how you can use this simple tool to become a more proactive and successful indoor gardener.
What Is a “Plant Cam” Anyway? (And Why It’s Not Just a Security Cam)

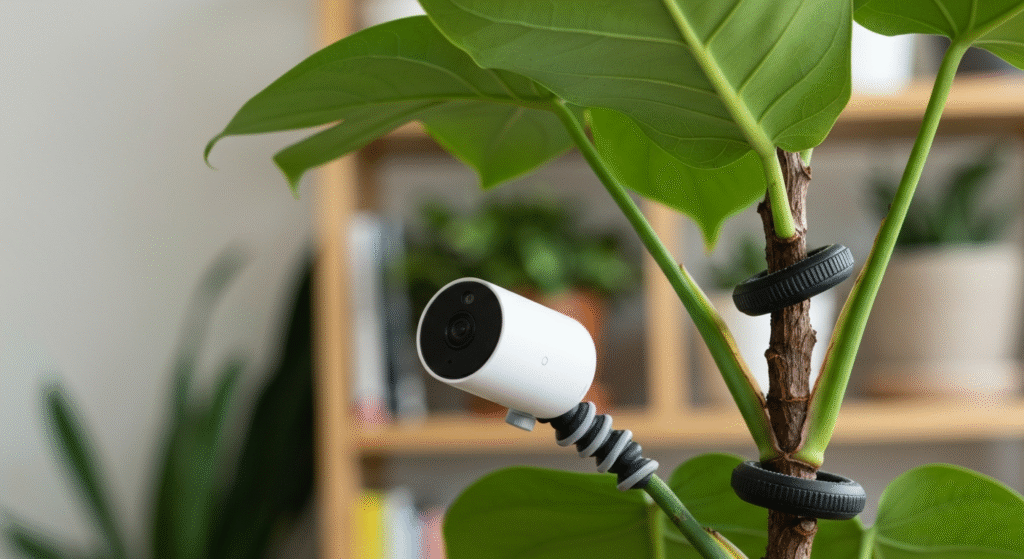
First, let’s be clear: there’s no magic “plant camera” category at the electronics store. A plant cam is simply a small, Wi-Fi-enabled camera that you repurpose for your indoor garden. This could be a basic smart home camera, a webcam, or even an old smartphone.
The difference isn’t the hardware; it’s the intent.
A security camera is designed to catch big movements from far away. A plant camera is your dedicated little botanist, placed up close and personal. Its job is to show you the tiny details you miss with a passing glance. For the past few years, I’ve used a couple of basic, affordable smart cameras to do just this. Their job isn’t to watch my living room, but to watch a single pot or a specific cluster of leaves. This focused mission is what makes them so powerful.
Catch Pests Before They Take Over: My Plant Camera Strategy
This is, in my opinion, the number one reason to get a camera for your plants. Pests like spider mites, thrips, and aphids are so small that by the time you see them with your naked eye, you often have a full-blown infestation. A camera gives you a magnified, consistent view that helps you spot the very first signs.
Spotting the “Invisible” Invaders Early
The biggest problem with pests is their speed. A few spider mites can become a colony of thousands before you even notice the first yellow-stippled leaf. A camera, especially one you can zoom in with on your phone, changes the game. You’re not just looking for bugs; you’re looking for evidence.
- Tiny Specks: Are those little white or black dots “dirt” or are they moving? A camera lets you check.
- Weird Textures: Is that a tiny, fine web in the V-shape of a leaf stem?
- Shadows: Are there small, dark shapes on the underside of the leaves?
My method is to set up a camera focused on a “high-risk” plant—usually a new one I’ve brought home or one (like an Alocasia or Calathea) that’s notoriously attractive to pests. I check the live feed once a day, zooming in on the undersides of leaves and where the stem meets the soil. It takes 30 seconds, and it’s saved me more times than I can count.
A Real-Life Example: The Alocasia and the Spider Mites
I have an Alocasia ‘Polly’ that is an absolute magnet for spider mites. I had just finished treating it and thought it was clear. I placed a small camera pointing at the underside of its newest, most tender leaf. For three days, nothing. On the fourth day, I checked the feed and zoomed in. I saw two… tiny… white… dots. They weren’t there yesterday.
I went over, checked with a magnifying glass, and sure enough, they were the first scouts of a new spider mite wave. Because I caught them that early, a simple wipe-down with a neem oil solution was enough. No massive infestation, no plant decline, no panic. Without the camera, I wouldn’t have seen them for at least another week, and by then, they would have been everywhere. This is the kind of early-warning system that university extension programs call crucial for managing these pests.
How I Set Up My “Pest Patrol” Cam
Your placement is key for pest hunting. Don’t just point the camera at the whole plant from five feet away. You need to get close.
- Get Low: Aim the camera at the soil level. This is perfect for spotting fungus gnat activity, springtails (mostly harmless, but good to know!), or even snail trails if you have an open terrarium.
- Aim High (and Under): This is my favorite. Use a small, flexible tripod (like a GorillaPod) to wrap the camera around a nearby shelf or even another plant’s pot. Point it up at the undersides of the leaves. This is where spider mites and thrips love to hide.
- Focus on New Growth: Pests love tender, new leaves. Aiming your camera at the newest unfurling leaf is a great strategy, as it’s a high-traffic area.
Here’s a quick table of what I’ve learned to look for. This isn’t a science lab; this is just what I’ve observed on my own cameras over the years.
| Pest | What I Look For on Camera | Best Camera Angle |
| Spider Mites | Fine, silky webbing (looks like dust). Tiny white, red, or black dots that move. Yellow stippling on the leaf surface. | Aimed up at the underside of leaves and at leaf/stem joints. |
| Fungus Gnats | Small, dark flies crawling on the soil surface. You’ll see them walking around. | Aimed directly at the top of the soil. |
| Thrips | Tiny, rice-shaped black or pale specks. They move quickly. You may also see silvery, damaged patches on leaves. | Aimed at the leaf surface (top and bottom). They are active. |
| Mealybugs | Small, white, cottony-looking clumps. They look like fuzz. They often hide in tight leaf joints. | Aimed at the “nooks and crannies”—where stems meet leaves. |
| Aphids | Small, green or black pear-shaped insects, often clustered on new growth or flower buds. | Aimed directly at new, tender stems and buds. |
This table comes from my own notes. Having this mental checklist makes my daily 30-second scan fast and effective.
The Ultimate Reward: Watching Your Plants Grow (Literally)
Okay, let’s move on from the creepy-crawlies. The other, much more joyful, reason to use a plant camera is to watch growth. Indoor plants can grow so slowly that it feels like nothing is happening. A camera proves you wrong in the most beautiful way.
The Magic of the Time-Lapse
This is, by far, the most rewarding part. Most smart cameras have a feature to create a time-lapse video. You set it to take a picture every few minutes or every hour, and it stitches them together.
The first time I did this on a Monstera leaf that was about to unfurl, I was hooked. Over 24 hours, the camera captured what my eyes would have missed: the leaf slowly cracking open, stretching, and finally flattening out. It’s mesmerizing.
It’s also incredibly useful. You can see:
- How a new leaf unfurls and “hardens off.”
- A flower bud slowly opening.
- A vining plant (like a Pothos) actively “reaching” for a light source.
This isn’t just for fun; it’s confirmation that your plant is healthy and active. It’s the best positive reinforcement an indoor gardener can get.
My “Prayer Plant” Experiment
I have a Calathea (a “prayer plant”) that is famous for its daily leaf movement, called nyctinasty. The leaves rise up at night (like hands in prayer) and lower during the day. I was curious, so I set a camera on it with the time-lapse running for 48 hours.
What I saw was amazing. It wasn’t just a simple “up and down.” I saw the exact time it started to “wake up” in the morning (around 7:00 AM, just as the room brightened) and when it started to “sleep” (around 5:30 PM, well before the sun set). I also noticed one of its leaves was a little “lazier” than the others, which told me that leaf might be on its way out. It’s a level of connection to the plant’s natural rhythm that I just couldn’t get otherwise.
Using Growth Cues to Understand Your Plant
A live feed or a time-lapse also shows you subtle signs of stress.
- Drooping: Does your plant look fine in the morning but terribly droopy by 3:00 PM? It’s likely getting too much hot, direct sun, or it’s telling you it’s thirsty before the soil is bone-dry.
- Leaning: A time-lapse will show how fast your plant is leaning toward the window. This is a clear sign it needs more light or needs to be rotated.
- Wilting and Recovering: This is a big one for me. I use my camera to water-check. I’ll see a plant start to just droop. I’ll water it, and then I can check the camera feed an hour later to see it perk right back up. It’s instant feedback that I did the right thing.
Choosing the Right Plant Camera (Without Wasting Money)
When I started, I bought a fancy, expensive, 360-degree rotating camera. I thought I needed it to scan my whole plant shelf. Here’s the truth: I never used the rotating feature. It was too broad. The real magic, as I learned, is in dedicated, close-up shots.
You don’t need to spend a lot of money. A simple, fixed smart camera that costs $30-$50 is often more than enough. After five years of testing, here are the features that I find genuinely matter for plant monitoring.
Key Features That Genuinely Matter
- Good Resolution (1080p is fine): You need to be able to zoom in on the digital feed and see detail. A blurry 720p camera won’t help you spot a spider mite. 1080p is the sweet spot for price and clarity.
- A Good App: The camera’s hardware is only half the story. You need a smartphone app that is stable, loads quickly, and lets you zoom, take screenshots, and easily access time-lapse features.
- Flexible Stand/Mount: This is almost more important than the camera itself. Can you angle it precisely? Does it come with a base that can sit on a shelf, or a mount you can attach to a post? This flexibility is non-negotiable for getting those perfect pest-hunting angles.
- Wi-Fi Connectivity: This is standard, but it’s what lets you check your plants from your couch or from work.
Features I Thought I Needed (But Didn’t)
- Pan/Tilt/Rotate: As I said, I never use it. It’s better to have two cheap, fixed cameras aiming at two different pots than one expensive rotating camera.
- Audio: Your plants (hopefully) aren’t making any noise. I always turn this feature off.
- Night Vision: This one is tricky. Standard infrared (IR) night vision makes plants look weird and ghostly, and you can’t see color. It can be useful for spotting nocturnal pests (like slugs), but for 99% of my monitoring, I just look during the day. If the camera has a very bright IR light, it can sometimes be disruptive. I’d rather have a camera that’s just good in low light.
- AI “Person” Detection: Useless for plants. Make sure you can turn these notifications off, or your phone will buzz every time a leaf rustles.
Here’s a simple breakdown of what I look for now when I’m adding a new camera to my setup.
| Feature | My Take: Does It Matter for Plants? |
| Resolution (1080p+) | Yes, critical. This is how you spot tiny pests. |
| Good Mobile App | Yes, critical. If the app is bad, you’ll never use it. |
| Flexible Stand | Yes, critical. You must be able to aim it properly. |
| Time-Lapse Feature | Highly Recommended. This is the #1 tool for watching growth. |
| Digital Zoom | Yes. You need this to check for pests on the live feed. |
| Night Vision (IR) | Not really. Usually not necessary and can distort the image. |
| Pan/Tilt (Rotating) | No. A gimmick for plants. Get a fixed camera. |
| Audio | No. Completely unnecessary. |
| Subscription Plan | Look closely. Many cameras require a subscription for time-lapse or saving videos. I prefer cameras that have a free, basic option. |
My advice? Start with one, inexpensive 1080p camera and see how you like it. You’ll learn more in one week of using it than in months of just reading.
My Simple Setup for the Best Views
You’ve got your camera. Now what? Don’t just stick it on a bookshelf ten feet away.
Finding the Right Angle and Distance
- Pest Angle: For pests, you want to be close—maybe 6-12 inches away from the target area (the soil or the underside of leaves).
- Growth Angle: For a time-lapse of an unfurling leaf, you’ll want to be about 12-24 inches away, giving the leaf “room to grow” in the frame.
- “Health Check” Angle: For monitoring watering cues (drooping), it’s okay to be 2-3 feet back to see the whole plant’s posture.
I use a mix of flexible “octopus” tripods that I wrap around my plant stands and the simple bases the cameras came with, sometimes propped up on a stack of books to get the perfect height.
The Problem with Lighting and Reflections
This was a big “trial and error” thing for me.
- Backlighting: Don’t point your camera directly at a bright window. Your plant will be a dark silhouette. The camera should be between the window and the plant, or looking at the plant from the side.
- Reflections: If your camera is inside a glass terrarium or pointing at one, you’ll just see a reflection of the camera. The solution is to get the camera lens as close to the glass as possible. This cuts the glare.
- Grow Lights: Be careful with bright LED or fluorescent grow lights. They can wash out the camera’s image or create weird color casts. You may need to adjust the camera’s position or “white balance” settings (if the app allows it) to get a natural look. I find it’s best to check the feed after the grow lights have turned off for the day.
Frequently Asked Questions (FAQs)
Can I just use an old security camera I have?
Absolutely. As long as it’s a Wi-Fi camera with a decent app and 1080p resolution, it will work perfectly. The “plant cam” is all about how you use it, not what it’s called.
Do I need a camera with night vision?
In my experience, no. Most indoor plant pests are active or visible during the day. Standard infrared (IR) night vision makes everything black and white, so you can’t see leaf color, and it can be hard to spot pests. I find it more useful to check my plants during the day.
How many plant cameras do I need?
I started with one! I just moved it around to “problem plants” as needed. After five years, I now have three in permanent spots: one watching my “pest-prone” Alocasia, one on my main new-growth shelf, and one pointing at my seedling tray. Start with one and see if you even like it.
Does the camera’s little LED light bother the plants?
No. A plant’s “light” and “dark” cycles are based on powerful full-spectrum light (like the sun or a strong grow light). A tiny status LED on a camera is not nearly bright enough to interfere with their photosynthesis or their “night” cycle. I’ve never had an issue with this.
My Final Thoughts
A plant camera is not a “set it and forget it” tool. It’s an engagement tool. It’s for the indoor gardener who truly wants to learn and be more in tune with their plants. It bridges the gap between the slow, analog pace of plant life and our fast, digital world.
For me, it’s reduced my plant anxiety, saved several plants from pests, and given me a much deeper appreciation for the tiny, daily miracle of growth. If you’re curious and love your plants, I can’t recommend it enough. You might just be amazed at what you’ve been missing.