Crispy brown edges. Sad, drooping stems. If you own a Calathea or a fern, you know the look. That feeling of defeat when your beautiful, dramatic plant decides—seemingly overnight—that it no longer wishes to live in your home. You’ve tried everything: misting, pebble trays, watering schedules. But the truth is, these plants aren’t just thirsty; they are particular. They demand a level of consistency that most busy humans simply can’t provide with a watering can alone.
Hi, I’m Priya. My journey into smart home gardening started about five years ago after I, quite frankly, killed one too many beautiful (and expensive) prayer plants. I got tired of the constant guessing games and crispy leaves. I’ve spent the last few years obsessively testing everything from DIY wicking strings to smart sensors and automated drip systems, all to figure out how to keep these fussy plants happy. What I’ve learned is that the secret isn’t a “green thumb”; it’s about creating consistency, and that’s where a little automation goes a long way.
This guide is the result of all that trial and error. We’re going to move past the simple “how-to-water” tips and dive into real, sustainable systems. We’ll explore how to set up automated and semi-automated watering methods that can finally bring peace to you and your fussy foliage.
Why Calatheas and Ferns Are So ‘Fussy’ About Water
Before we can fix the problem, we have to understand it. Why do these plants act so dramatic when my Pothos is perfectly happy being forgotten for two weeks?
It boils down to their original homes. Most Calatheas and many popular ferns (like Maidenhairs and Boston Ferns) are understory plants. They grow on the floors of tropical rainforests. This environment provides two things they crave:
- High Humidity: The air is thick with moisture.
- Consistently Damp Soil: The ground is shaded, covered in leaf litter, and receives frequent rain. It’s always damp, but never a soggy, flooded swamp because the drainage is excellent.
Your home is the opposite. It has dry, climate-controlled air and a plant parent who either forgets to water (leading to drought) or waters too much (leading to root rot).
The Narrow ‘Just Right’ Window
Most houseplants have a wide “happy window” for moisture. They can tolerate drying out almost completely, then getting a deep soak.
Calatheas and ferns? Their window is tiny.
- Too Dry: The moment the soil pulls away from the pot, the sensitive feeder roots die back. This is when you see the dreaded crispy, brown edges and curling leaves.
- Too Wet: If their roots sit in standing water for even a day or two, they can’t get oxygen. Root rot, a fungal disease, sets in fast. This looks like yellowing, mushy stems and a plant that droops as if it’s thirsty (because its rotting roots can no longer drink).
Our goal with automation is to stop the wild swings. We need to create a system that keeps the soil in that perfect “lightly damp, like a wrung-out sponge” state all the time.
The Goal: Moving from “Watering” to “Consistent Moisture”
I had a breakthrough when I stopped thinking about “watering my plants” on a schedule. My Calathea didn’t care if it was “Watering Wednesday.” It cared about the moisture level in its soil right now.
This mindset shift is key. Automation isn’t about setting a timer to dump water on your plant every three days. It’s about creating a system that responds to the plant’s needs or provides a slow, steady supply of moisture that mimics its natural habitat.
We’ll explore this in three levels, from simple, low-tech solutions to more advanced smart setups. I’ve used all of them, and each has its place.
Level 1: Low-Tech & DIY Water Automation
This is where I started. These methods are perfect if you have just a few high-need plants or want to test the waters of automation without spending much money.
Self-Watering Pots: The First Step
These were my first true “win.” A self-watering pot isn’t magic; it’s just a pot with a water reservoir at the bottom. A wicking system (often a piece of absorbent rope or a porous “foot” of terracotta) pulls water up from the reservoir into the soil as the soil dries out.
This directly attacks the problem. The soil only “drinks” what it needs, keeping it consistently moist without being waterlogged.
How to Use Them Correctly:
- Don’t plant directly in them: I always pot my plant in a simple nursery pot (the thin plastic one it comes in). Then, I place this nursery pot inside the self-watering planter. This lets me easily lift the plant out to check the roots or the reservoir.
- Let the reservoir go dry: This is crucial. I let my self-watering reservoirs go completely dry for a day or two between refills. This short “dry spell” ensures the soil gets a chance to breathe and prevents it from becoming a soggy, anaerobic mess.
- Top-water first: When you first pot a plant, water it from the top a few times. This encourages the roots to grow down toward the reservoir. After a few weeks, you can switch to only filling the reservoir.
Here’s the quick rundown I wish I’d had before I bought my first ones:
| Pros | Cons |
| Excellent consistency. Solves the “dry-out” problem. | Risk of overwatering. If the wick is too large or the soil too heavy, it can stay too wet. |
| Reduces watering frequency. I fill my reservoirs once every 1-2 weeks. | Not all pots are equal. Some cheap ones have bad wicking systems. |
| Great for vacations. This is my number one vacation-prep tool. | Can hide problems. You have to remember to check the reservoir and the plant itself. |
| Reduces fungus gnats. The soil surface stays drier, which they hate. | Minerals can build up. You must flush the soil by watering from the top every few months. |
My Experience: My Calathea ‘Zebra Plant’ lived a sad life until I moved it into a Lechuza-style self-watering pot. It was a complete transformation. New leaves started unfurling without a single brown edge. This is, in my opinion, the single best solution for most Calathea owners.
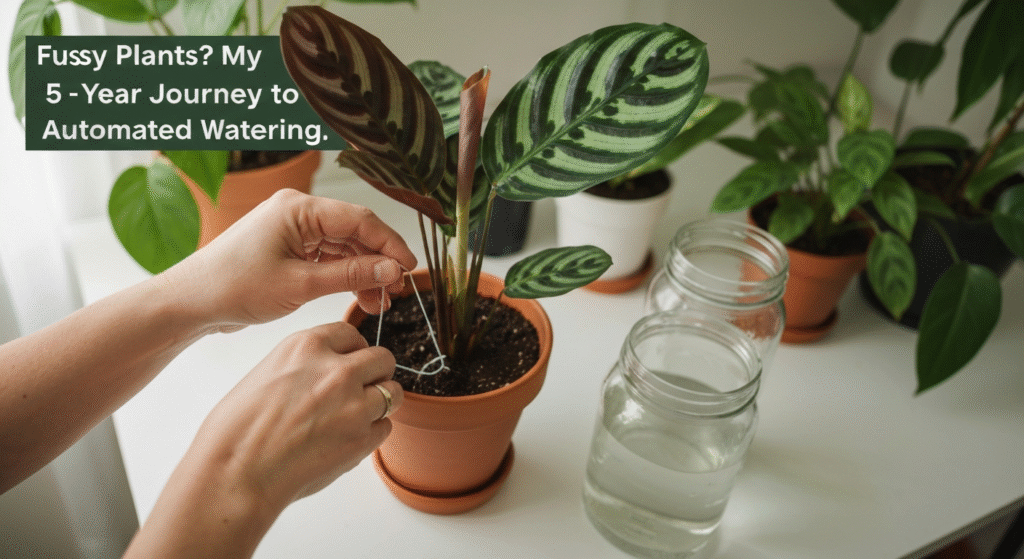
DIY Wicking Systems (The ‘String’ Method)
This is the budget version of a self-watering pot. It’s perfect for when you’re going on vacation or just want to try the concept.
The Setup:
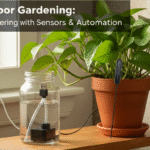
- Find a water reservoir (a jar, a vase, a large Tupperware).
- Find a wick. This is the most important part. After much testing, nylon string or acrylic yarn is what I recommend. Cotton or other natural fibers rot and become a moldy mess.
- Cut a length of string. Shove one end deep into your plant’s soil (use a chopstick or pencil to get it near the root ball).
- Drape the other end into your reservoir.
- Place the reservoir lower than the plant pot. Gravity is key. Water will be pulled up the string as the soil dries out. If you place the reservoir higher, it can siphon water and flood your plant.
This method has saved my fern collection more than once during a week-long trip. It’s not pretty, but it’s incredibly effective and gives you precise control.
Watering Globes (and Why I’m Cautious)
You’ve seen them: the pretty, hand-blown glass globes or terracotta spikes. The idea is that you fill them with water, stick them in the soil, and they slowly release water.
My Honest Take: I don’t use them for my fussy plants. Ever.
Here’s the problem: they are wildly unpredictable. I’ve had globes get clogged with soil and release no water. Worse, I’ve had them dump their entire contents in the first hour, creating a swamp that nearly killed my Maidenhair Fern.
They rely on a perfect vacuum seal with the soil, which is almost impossible to get right. For a tough plant like a Pothos, they might be fine. For a Calathea, the risk is just too high. I’ve thrown all mine out.
Level 2: Smart Sensors (The Game Changer)
This is where my smart home background really started to pay off. Level 1 automation is great, but it’s still a bit of a “set it and hope” system. Smart sensors, on the other hand, give you data.
A smart plant sensor is a small probe you stick in the soil. It connects to an app on your phone (usually via Bluetooth or Wi-Fi) and tracks key metrics:
- Soil Moisture (%)
- Fertilizer Level
- Ambient Light
- Temperature
For our purposes, the soil moisture percentage is the holy grail.
How I Use Sensors for My Fussy Collection
I stopped guessing when my Calathea Orbifolia needed water. I could see the data.
My “aha!” moment wasn’t just getting an alert. It was watching the graph in the app. I could see exactly how fast the soil dried out after I watered it. This was the real breakthrough.
What I learned from sensors:
- My Boston Fern in a terracotta pot dried out twice as fast as the same fern in a glazed ceramic pot. The sensor data proved it.
- My Calathea’s “happy” moisture range is between 40% and 60%. Below 35%, the leaves start to curl. Above 70%, I’m risking root rot.
- The soil near the windows dries out much faster than the soil on my “jungle shelf” in the corner.
Sensors turn you from a “plant owner” into a “plant scientist.” You learn the specific “thirst curve” of each pot and plant.
Pros and Cons of Smart Sensors
I’ve tested several brands, from the popular to the cheap knock-offs. Here’s what I’ve found.
| Pros | Cons |
| Precise Data. No more guessing. You know the moisture level. | Cost. Good sensors aren’t cheap, especially for a large collection. |
| Prevents Overwatering. This is the #1 killer. Sensors are the best defense. | Battery Life. They all run on batteries that need changing (usually every 6-12 months). |
| Learn Your Plant. The graphs teach you how your plant uses water. | Calibration. Some cheap sensors are just awful. They’ll read “100%” or “0%” and nothing in between. |
| Peace of Mind. A quick glance at the app confirms everyone is happy. | One-Spot Reading. The sensor only reads the spot it’s in. You have to place it correctly, near the roots. |
A quick tip: I’ve found that sensors that give you a percentage (e.g., “45% moisture”) are far more useful than ones that just say “Wet,” “Moist,” or “Dry.” The goal is to find that “just right” percentage and keep it there. They don’t automate the watering, but they automate the knowledge, which is arguably more important.
Level 3: Fully Automated Drip & Pump Systems
Welcome to the deep end. This is for the plant collector who has a lot of fussy plants, travels frequently, or just loves a good tech project. This is where we take the data from Level 2 and connect it to the action of Level 1.
After my collection grew to over 20 Calatheas and ferns, even with sensors and self-watering pots, the upkeep was becoming a part-time job. I decided to build a system.
What is an Automated Drip Irrigation System?
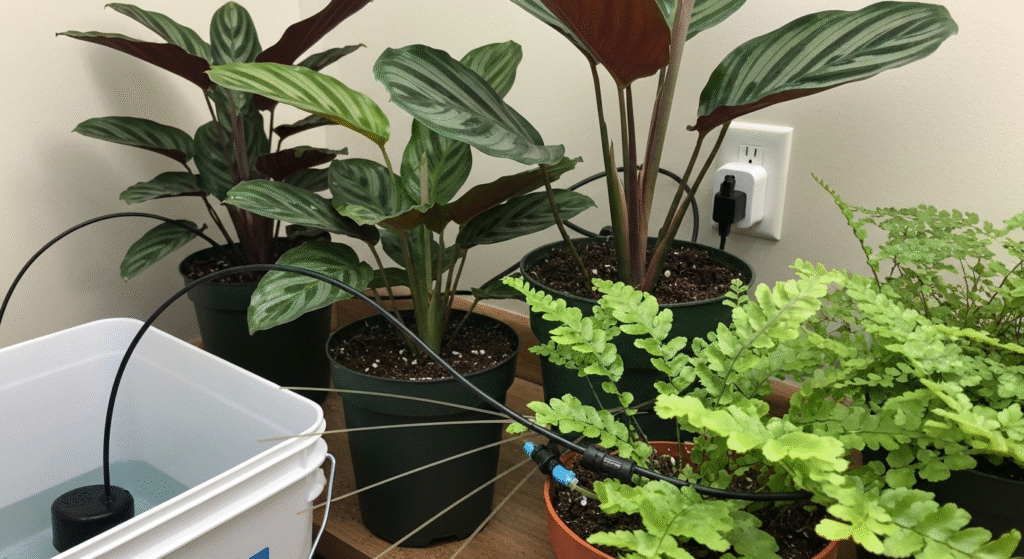
At its core, it’s simple. It consists of:
- A Reservoir: A large container of water (I use a 5-gallon bucket with a lid).
- A Pump: A small, submersible aquarium pump.
- A Timer: This is the “brain.” It can be a simple outlet timer or, in my case, a smart plug.
- Tubing: A “main line” (usually 1/4-inch) that carries water from the pump.
- Drippers: Small “spaghetti” tubes (1/8-inch) that branch off the main line and go to each plant pot, ending in a drip emitter.
When the timer/smart plug turns on, the pump pushes water from the reservoir, through the tubing, and delivers a slow, controlled drip to each plant.
My Journey Building a Custom System
My first attempt was a mess. I used cheap, non-adjustable drippers and came home to find I had created a small pond on my bookshelf. My prized Maidenhair Fern was floating. It was a low point.
But I learned. Here’s what my 5+ years of tinkering have taught me:
- Pressure-Compensating Drippers are a Must: This is the most important part. Cheap drippers release tons of water at the start of the line (near the pump) and a tiny trickle at the end. Pressure-compensating drippers use a small diaphragm to release the exact same amount of water (e.g., 0.5 gallons per hour) regardless of their position. This ensures your first plant and your last plant get the same drink.
- Smart Plugs Are Your Best Friend: Forget those clunky, pin-based timers. I plugged my pump into a $10 smart plug. Now, I can set a complex schedule in an app (e.g., “Turn on for 90 seconds at 8 AM, Mon-Wed-Fri”). Even better, I can trigger it manually from my phone from anywhere. If I see a plant looks droopy on my remote pet-cam, I can give it a quick drink.
- Use Filtered Water: This is the huge one for Calatheas. I automated my system, and at first, all the leaves got worse. The dreaded brown tips were back with a vengeance. I realized my system was using tap water. The automation was working, but the water was the problem. Calatheas and many ferns hate the chlorine, fluoride, and minerals in tap water. My entire 5-gallon reservoir is now filled only with water from my filtered pitcher. This was the final piece of the puzzle. For more on this, check out this guide on watering plants from the New York Botanical Garden, which touches on water quality.
Comparison: DIY System vs. Pre-Made Kits
You can buy all-in-one kits, but I’ve found building my own is better and often cheaper.
| Feature | DIY System | Pre-Made Kit (e.g., Claber, RainPoint) |
| Cost | Low to Medium. You buy components piecemeal. | Medium to High. You pay for the convenience. |
| Customization | Excellent. You choose the pump, tubing, and number of drippers. | Limited. Often restricted to a set number of plants (e.images., 10 or 20). |
| Ease of Use | Difficult setup. Requires cutting tubes and planning. | Easy setup. Often snaps together in 30 minutes. |
| Reliability | High (if built well). You choose quality parts. | Varies. Pumps and timers can be low-quality. |
| My Take | I’ve found pre-made kits are a great starting point, but I quickly outgrew them. Building my own, while it took a weekend of tinkering, lets me water my sensitive Maidenhair fern with one slow dripper and my huge Boston Fern with three. |
Putting It All Together: My ‘Perfect’ Hybrid Setup
After all this, you’re probably wondering what my actual setup looks like. For my most prized, most fussy plants (I’m looking at you, Calathea White Fusion), I use a hybrid approach.
It’s a combination of all three levels.
- Level 1 (The Pot): The plant lives in a self-watering pot. This provides the baseline of consistent moisture.
- Level 2 (The Brain): A smart moisture sensor is stuck in the soil. This doesn’t trigger the watering. It’s my “dashboard.” It sends me an alert when the soil moisture inside the pot drops to 40%, which tells me the reservoir is probably empty.
- Level 3 (The Action): An automated drip line isn’t aimed at the plant’s soil. It’s aimed at the reservoir fill-hole of the self-watering pot.
Here’s the magic: When my app says “White Fusion is at 40%,” I open my smart plug app and run the “Refill” automation. The pump kicks on for 60 seconds, and the drip line refills the self-watering reservoir.
This system is the best of all worlds:
- The plant is never overwatered (it only wicks what it needs).
- The soil is never flooded from the top.
- I have precise data on my plant’s health.
- The refilling process is 100% automated and remote.
This is how you get a plant that thrives, not just survives.
Common Mistakes and How to Avoid Them
I’ve made all of these. Please learn from my pain.
- Mistake 1: The “Set It and Forget It” Mentality.Automation helps, but it doesn’t replace being a plant parent. You still need to look at your plants. Check for pests. Check for new leaves. My pump clogged once, and the system ran “dry” for a week. I only knew because I looked at my plants and saw them drooping. Your automation system is a tool, not a replacement for you.
- Mistake 2: One Size Fits All.Do not use the same 1-gallon-per-hour dripper on your 2-inch Maidenhair Fern that you use on your 3-foot-tall Calathea. Your small plants need less water, less often. Use smaller, adjustable drippers for them.
- Mistake 3: Forgetting About Drainage.Automation is useless if your pot doesn’t have a drainage hole. You are just building a very efficient root-rot soup maker. All my plants, even those in self-watering pots, are in inner nursery pots with excellent drainage.
- Mistake 4: Not Checking the Reservoir.This seems basic, but I’ve done it. Your fancy pump and smart plug are useless if your 5-gallon water bucket is empty. I now have a calendar reminder every Sunday to check my main reservoir and top it off with filtered water.
Your Quick Questions Answered (FAQs)
Q: Can I just use a humidifier instead?
A: A humidifier is excellent for ferns and Calatheas, but it only solves the air moisture problem. It won’t help with the soil moisture consistency. You need to do both.
Q: Will an automated system work if I use chunky, aroid-style soil?
A: Yes! In fact, it’s often better. Chunky soil (with bark, perlite, etc.) has great drainage, which prevents rot. The wicking systems and drip systems will keep the parts of the soil (like the coir or moss) moist, while the bark keeps air pockets open for the roots.
Q: How do I know how long to run my drip system for?
A: Trial and error. Start small. Run your pump for 30 seconds. Wait 10 minutes, then check the soil. Is it damp? Did water run out the bottom? My magic number for most 6-inch pots is about 90 seconds, twice a week. But your number will depend on your pump, your soil, and your plant.
Q: Is automation expensive?
A: It doesn’t have to be. A DIY wicking system (Level 1) costs pennies. A good self-watering pot might be $20-$30. A single smart sensor (Level 2) is about the same. A full-blown DIY drip system (Level 3) for 10 plants can be built for under $75. It’s an investment that has paid for itself by saving my expensive plants.
Making Peace with Your Fussy Plants
The journey from “plant killer” to “confident plant parent” isn’t about finding a magic “green thumb.” For me, it was about embracing my inner nerd. It was about realizing that these beautiful, fussy plants aren’t trying to be difficult; they’re just asking for a little bit of their rainforest home.
Automation is how we build that for them. It’s not about being lazy; it’s about being consistent. Whether you start small with a single self-watering pot or go all-in with a smart drip system, the goal is the same: to stop the cycle of drought and deluge.
Your Calatheas and ferns can thrive. You just need to give them a system that lets them be their best, most dramatic, and beautiful selves. Happy planting.