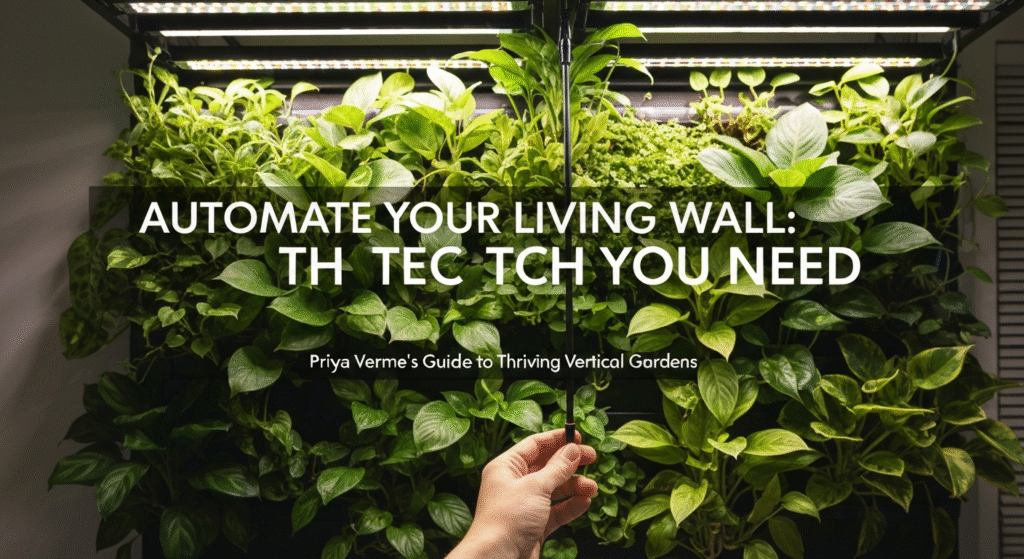
A lush, green living wall can completely change a room. It brings life, purifies the air, and serves as a stunning piece of natural art. But here’s the reality no one talks about at first: that beautiful wall is a high-maintenance relationship. Vertical gardens dry out incredibly fast, watering them is a messy chore that often leads to wet floors, and ensuring every single plant gets enough light and nutrients is a constant guessing game.
Hi, I’m Priya. My journey into smart gardening started about five years ago, born from a mix of frustration and fascination. I desperately wanted a lush, green living wall in my apartment, but I kept struggling to keep everything alive, especially with my busy schedule. I became obsessed with finding a way to use technology not to replace the joy of gardening, but to make it more forgiving. After countless hours of tinkering, testing (and failing with) different pumps, sensors, and timers, I’m here to share what I’ve learned in a simple, straightforward way.
Automating your living wall is the difference between a plant cemetery and a thriving, self-regulating ecosystem. It’s the secret to keeping that wall alive and beautiful, even if you go on vacation for a week.
What Does “Automating” a Living Wall Really Mean?
When most people hear “automation,” they think of a simple outlet timer. That’s a start, but it’s not the whole story. True automation means creating a smart, responsive system.
Instead of just watering at 8 AM every day, a smart system checks if the plants are actually thirsty and waters them accordingly. Instead of just blasting lights for 12 hours, it provides the right kind of light and can even mimic a sunrise.
For me, the goal was to build a wall that could survive my own forgetfulness and busy travel schedule. I wanted to stop reacting to dying plants and start preventing problems before they began. This involves four key parts:
- Water: Delivering it precisely when and where it’s needed.
- Light: Providing the right spectrum and duration, consistently.
- Nutrients: Dosing the “plant food” automatically, especially for hydroponics.
- Monitoring: Using sensors as your “eyes and ears” to check temperature, humidity, and soil moisture.
Let’s break down the tech you need for each of these, starting with the most critical part: water.
The Lifeline: Smart Irrigation and Watering Systems
This is the number one failure point for vertical gardens. The top plants get soaked, while the bottom ones are bone-dry. Or, the whole thing dries out in a single hot day. Automated irrigation solves this. Your choice of tech here depends on your wall’s setup.
Soil-Based vs. Hydroponic Walls
First, you need to know what kind of wall you’re automating.
- Soil-Based Walls: These use felt pockets or modular planters filled with a lightweight potting mix. They are simpler to set up but harder to water evenly. Your tech goal here is precision drip irrigation.
- Hydroponic Walls: These use no soil. Plants grow in a nutrient-rich water solution that flows over their roots. This is more complex upfront but, in my experience, much easier to automate. Your tech goal is a recirculating pump system.
My first wall was a large felt-pocket system. It was a disaster. I’d hand-water the top, and it would drip all over my floor while the bottom pockets remained dry. This failure is what pushed me to find a better way. I switched to a modular planter system with a built-in reservoir, which was the first step toward automation.
Smart Irrigation Tech for Soil Walls
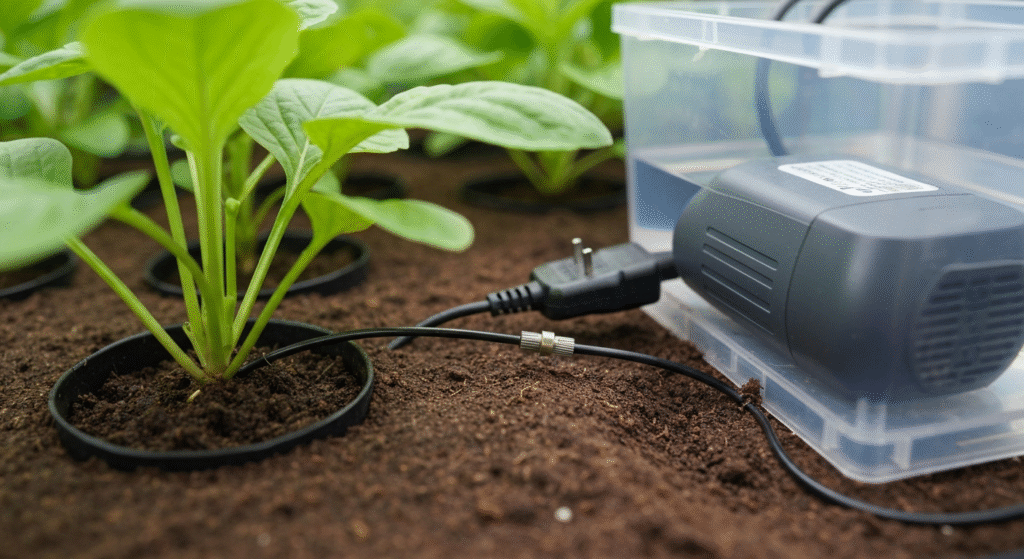
For soil-based walls, you need to create a simple drip system.
- The Core Parts: You’ll need a water reservoir (a large tub or bucket is fine), a small submersible pump (like one for a small fountain), and 1/4-inch drip tubing with pressure-compensating emitters. These emitters ensure each plant gets the same amount of water, regardless of its position.
- The “Smart” Part (The Brain): The pump can’t just run 24/7. You need to control it.
- Simple Timer: A basic digital outlet timer. Cheap, but “dumb.” It will water even if the soil is already wet.
- Smart Plug: This is the best entry-level option. A Kasa, Wemo, or Wyze smart plug connects to your Wi-Fi. You can set complex schedules from your phone (e.g., “Run pump for 2 minutes, twice a day”).
- Smart Moisture Sensor: This is the true smart solution. You place a sensor (like an Ecowitt) in the soil. You can then set up a rule: “IF moisture level drops below 40%, THEN turn on the smart plug for 3 minutes.” This waters based on the plant’s actual need, not a blind schedule.
Smart Irrigation for Hydroponic Walls
Hydroponics sounds high-tech, but it’s often simpler. These systems are designed to be automated. They almost always use a recirculating pump in a main reservoir that pushes the nutrient solution to the top of the wall, letting it trickle down over the plant roots and back into the tank.
Here, the “automation” is just a timer.
- Simple Timer: For many systems, you just need to run the pump 15 minutes on, 45 minutes off, 24/7. A cheap digital timer works perfectly.
- Smart Plug: A smart plug gives you more control. For example, you might find your pump is slightly too loud at night. You can set a schedule on your phone to run it less frequently (e.g., 10 minutes every 2 hours) overnight without getting out of bed.
Here’s a quick comparison I’ve put together based on my own setups. This is just my take, but it’s what I’ve found after years of trying both.
| Feature | Soil-Based (with Smart Plug) | Hydroponic (with Timer) |
| Setup Cost | Low. A pump and smart plug are cheap. | Medium. The wall system itself costs more. |
| Mess Factor | Medium. Soil can still be messy. | Low. No soil, and water is self-contained. |
| Risk | High. If the timer fails, plants dry out fast. | Low. The reservoir holds a lot of water. |
| My Experience | Good for beginners, but I was always tweaking it. | More work to set up, but I trust it for a week. |
Giving Life: Automated Lighting for Indoor Walls
Unless your wall is directly in front of a massive, south-facing window, you need grow lights. Window light is almost never enough for an entire wall of plants. Automation here is all about consistency.
Choosing the Right Lights
Forget those blurple (blue/purple) lights; they work, but they make your room look like a sci-fi lab. Today’s full-spectrum LED lights are the way to go. They cast a clean, white light that is pleasant for you and perfect for your plants.
- LED Strips: Good for “backlighting” a wall or tucking under shelves.
- LED Bars: This is my preference. A few 2-foot or 4-foot T5 or T8 bar fixtures mounted on the ceiling or wall a foot or two away can illuminate the whole wall evenly.
- Spotlights: Good for highlighting specific “feature” plants, but not for broad, even coverage.
Smart Light Automation
Plants need a regular day/night cycle, typically 12-16 hours of light. A simple outlet timer can do this. But “smart” automation gives you better options.
- Smart Plugs: Again, the reliable workhorse. Plug your light bars into a smart plug and set a simple “on/off” schedule in the app. This is what I use for 90% of my lighting.
- Smart Bulbs/Fixtures: If you use spotlight bulbs (like BR30s), you can get smart bulbs (like Philips Hue or Kasa). This lets you not only schedule them but also dim them.
My “Aha!” Moment with Lights: I found that turning on all my bright grow lights at 7 AM was a bit jarring (for me and the plants). Now, I use two smart plugs. One plug controls the main, high-intensity lights. The second controls a smaller, dimmer light.
- 7:00 AM: The dimmer light turns on (like a gentle “sunrise”).
- 7:30 AM: The main lights turn on.
- 8:30 PM: The main lights turn off.
- 9:00 PM: The dimmer light turns off (a “sunset”).
It’s a small detail, but it feels more natural and eases the plants’ transition.
Feeding Your Wall: Automated Nutrient Dosing
If you have a soil-based wall, you can mostly skip this. You’ll just use a slow-release fertilizer in the soil or manually add liquid fertilizer to your water reservoir every few weeks.
But for hydroponics, this is critical. The water in your reservoir is the only source of food. Plants will quickly consume the nutrients, and the solution’s pH will drift, “locking out” plants from absorbing the food that’s right in front of them.
The Problem: Manual Dosing is a Pain
In the beginning, I measured and mixed my A/B nutrients and pH balancers by hand every week. It was a messy, tedious chemistry class. I’d spill things, and my measurements were inconsistent.
The Solution: Dosing Pumps
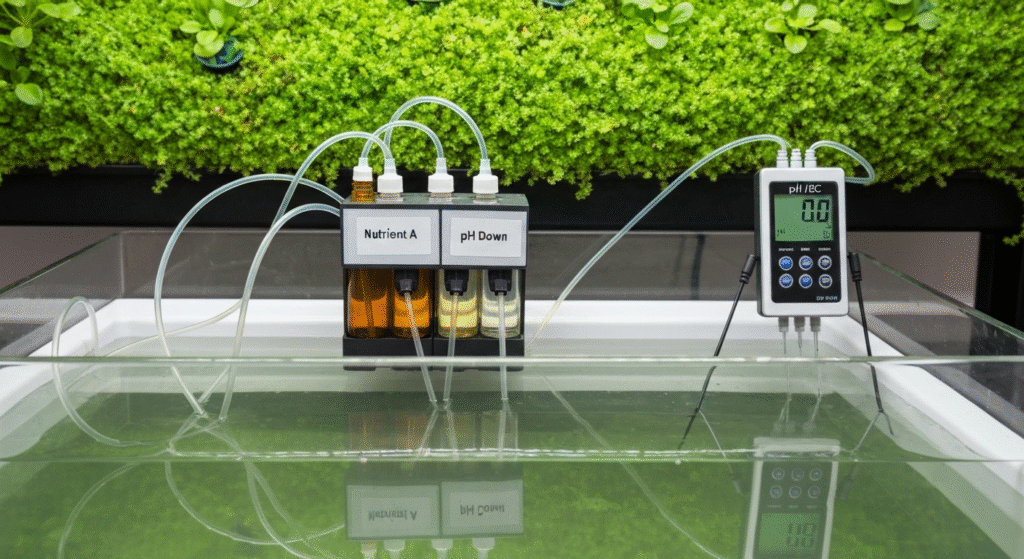
The professional solution is an automated dosing pump (also called a peristaltic pump). This is a small, precise pump that sips a tiny, exact amount of liquid from a bottle and squirts it into your reservoir.
You set it up with your bottles of nutrients (e.g., “Nutrient A,” “Nutrient B,” “pH Down”). Then, you connect the doser to a smart controller or a simple timer.
- Simple Method: Connect the dosing pump to a smart plug. Set a schedule to run the pump for, say, 10 seconds every day. This adds a small, consistent “top-off” of nutrients.
- Advanced Method: This is where it gets really cool. You can pair the dosing pumps with an EC/pH controller. This device constantly monitors the water.
- If the EC (nutrient strength) drops, it triggers the nutrient dosing pump.
- If the pH (acidity) rises, it triggers the “pH Down” dosing pump.
This is a fully automated system. It’s expensive, but it’s the peak of living wall automation.
My Current Setup (The Happy Medium): Full monitoring/dosing systems from brands like Bluelab can be very costly. I use a “semi-automated” approach. I have a smart monitoring probe that sends my phone an alert if the pH or EC drifts out of range. I then use my smart-plug-connected dosing pumps to fix it. I just open my phone, tap a button to run the “pH Down” pump for 15 seconds, and wait for the monitor to confirm it’s fixed. It’s the perfect balance of cost and control.
The “Nervous System”: Sensors and Smart Hubs
Your pumps and lights are the “muscles.” Your sensors and hubs are the “brain.” This is what ties everything together into one smart, cohesive system.
Essential Environmental Sensors
Beyond soil moisture and water pH, you need to monitor the air.
- Temperature & Humidity: These are crucial. If humidity gets too high (above 70-75%), you risk mold and fungal diseases. If it’s too low, plants (especially tropicals) will get crispy. A simple Govee or Aqara sensor is cheap and will alert your phone to any problems.
- Airflow: This is the most underrated part of a living wall. Stagnant, humid air is a recipe for disaster. I have a small, 4-inch clip-on fan aimed across the face of my wall (not directly at it). It’s plugged into a smart plug and runs for 15 minutes every hour. This single change eliminated all my mold problems.
Choosing Your “Brain”: The Smart Hub
You now have a bunch of devices from different brands: a Kasa smart plug, an Ecowitt sensor, a Govee humidity monitor. How do you make them talk to each other? You need a central hub.
Here’s how I see the options, from simple to advanced.
| Hub Type | How It Works | Best For… | My Experience |
| Wi-Fi Apps (Simple) | Google Home, Amazon Alexa | Beginners. Good for basic “if-then” rules. (e.g., “At 8 AM, turn on Kasa Plug ‘Lights'”). | Great start. Limited to one-way rules and depends on the internet. |
| Local Hub (Advanced) | Home Assistant, Hubitat | Tech-savvy users. Creates complex, local rules that don’t need the internet. | This is what I use now (Home Assistant). It’s a steep learning curve, but it’s unstoppable. My wall runs even if my Wi-Fi is down. |
With a hub, you can create powerful “automation recipes”:
- “IF the Govee humidity sensor reads above 75% THEN turn on the ‘Smart Fan’ plug.”
- “IF the Ecowitt soil sensor reports ‘Dry’ THEN send a notification to my phone AND run the ‘Water Pump’ plug for 2 minutes.”
- “IF the time is 9:00 PM THEN turn off ‘Main Lights’ AND turn on ‘Leak Sensor’ plug.” (A smart trick: I have a water leak sensor on a smart plug so it only has power and checks for leaks after the watering cycle is done, avoiding false alarms).
Common Problems I’ve Hit (and How to Fix Them)
Automation is not “set it and forget it.” It’s “set it and monitor it.” You will have problems. Here are the ones that nearly made me quit.
- Problem: Clogged Drip Emitters.
- What Happens: Tiny bits of soil, salt, or mineral buildup clog the drip emitters. One half of my wall became bone dry, while the other was fine.
- My Fix: I placed a small mesh filter on the intake of my submersible pump. I also run a weak vinegar-water solution through the empty system every 6 months to descale the emitters.
- Problem: Pump Failure (The Flood).
- What Happens: My main reservoir pump failed… in the “on” position. It pumped all 10 gallons of water onto my wall and then onto my hardwood floor.
- My Fix: This was an expensive lesson. I now have two layers of protection. First, my reservoir is inside a second, larger “overflow tray.” Second, I have a Wi-Fi water leak sensor on the floor next to the tray. It has saved me twice. The instant it detects moisture, it sends a screaming alert to my phone.
- Problem: Sensor “Drift.”
- What Happens: My high-tech pH and EC sensors started giving me crazy, inaccurate readings. I was adding “pH Down” to water that was already acidic.
- My Fix: I learned the hard way that these sensors are not maintenance-free. They must be calibrated every 4-6 weeks using special buffer solutions. It’s a 10-minute chore that is absolutely, 100% necessary for a healthy hydroponic system.
- Problem: The Wi-Fi Outage.
- What Happens: My internet went down for a weekend while I was out of town. All my “smart” plugs, which relied on cloud-based schedules, stopped working. My wall got no light or water for 48 hours.
- My Fix: This is the exact reason I upgraded to a local hub (Home Assistant). All my rules are stored on a tiny computer in my house. The internet can go down, and my wall’s life-support system keeps running perfectly. For beginners, many smart plugs (like Kasa) now have a “local schedule” feature that helps prevent this.
For more information on the foundational structures of vertical gardens, I’ve found university extension sites to be an incredible, unbiased resource. This guide on Vertical Gardening Using Trellises, Stakes, and Cages from Virginia Tech is a great place to start understanding the physical builds.
Frequently Asked Questions (FAQs)
- 1. Is automating a living wall expensive?It doesn’t have to be. You can start with a $15 smart plug for your lights and another for a $20 pump. A basic, effective automation setup can be built for under $50. The high-end pH/EC controllers and dosing pumps are what get expensive, but they are totally optional for soil-based walls.
- 2. Can I automate an outdoor living wall?Yes, but the tech is different. You’d use a smart irrigation controller (like an Orbit B-hyve or Rachio) that connects directly to your home’s water line. These are weather-aware and will automatically skip watering if it rains.
- 3. What’s the biggest mistake beginners make?Trying to automate everything at once. Start simple. Get a smart plug for your lights. Master that. Then, add a pump on a smart plug. Master that. Then, add a sensor. Build your system piece by piece.
- 4. How much maintenance is really left after automation?Automation handles the high-frequency, daily chores (watering, lights). You are still the gardener. Your job shifts from “laborer” to “manager.” You’ll spend about 30 minutes a week:
- Refilling the water reservoir.
- Adding nutrients (if not fully automated).
- Pruning dead leaves.
- Wiping down sensors.
- Checking for pests.
Your Wall, Only Smarter
Automating a living wall has been one of the most rewarding projects I’ve ever done. It blends my love for nature with my inner tech geek. The goal isn’t to create a hands-off, robotic plant. The goal is to use technology to create a stable, thriving environment where your plants can flourish.
By taking the daily guesswork out of watering and lighting, you get to spend your time on the fun parts of gardening—like pruning, styling, and just enjoying the view.
Would you like to dive deeper into a specific part of this, perhaps a step-by-step guide on setting up a simple smart plug irrigation system?