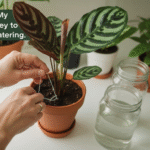
Watering indoor plants should be relaxing. But for many of us, it’s a constant source of stress. Am I watering too much? Too little? That beautiful fiddle-leaf fig you spent a fortune on suddenly has brown, crispy leaves. Or worse, the roots of your favorite succulent have turned to mush from root rot. The truth is, consistency is the one thing plants crave most, and it’s the one thing we humans are often worst at providing.
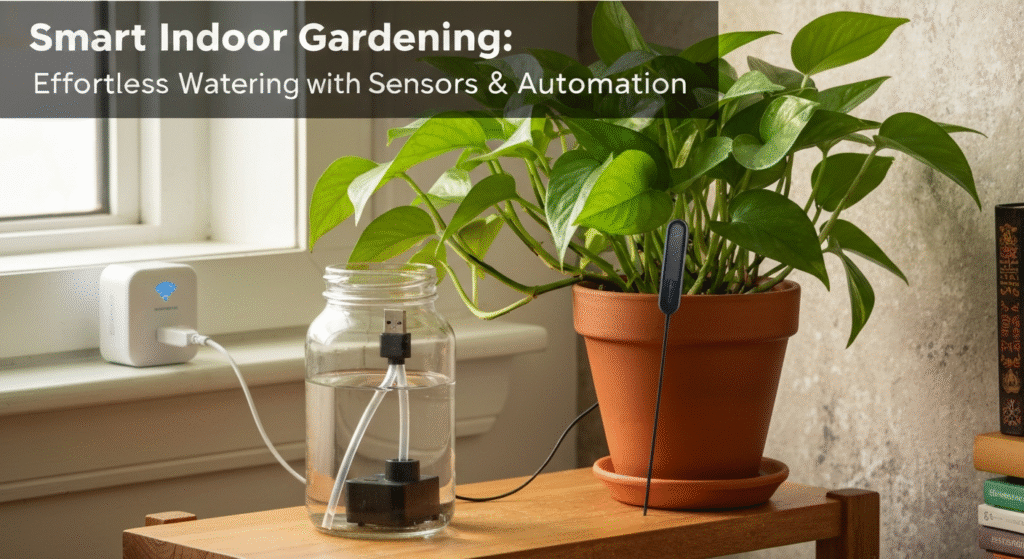
That’s where smart home automation comes in. What if your plant could just… tell you when it’s thirsty? And what if your watering system could listen and respond all by itself? This isn’t science fiction; it’s a setup you can build in under an hour. This guide will show you exactly how to connect a smart moisture sensor to a watering pump, creating a fully automated system that only waters when your plant actually needs it.
Hi, I’m Priya. My journey into smart gardening started about five years ago, born from a classic problem: I loved my indoor plants, but I was terrible at remembering to water them. I turned my tiny apartment into a test lab, tinkering with sensors, pumps, and automations until I found systems that actually work. After countless failed experiments (and a few drowned succulents), I’m here to share the simple, reliable setups that finally gave me a thriving indoor garden, so you can skip the frustration and get right to the good part.
Why Bother Automating Your Watering?
Going “smart” with your indoor garden might sound like a gimmick, but the benefits are very real. I found this out firsthand. My early plant-parent days were a cycle of feast and famine. I’d forget to water for two weeks, then panic and flood everything. Automating my setup wasn’t just about convenience; it was about saving my plants from me.
Here’s what this system really does for you:
- Prevents Root Rot: This is the number one killer of potted plants. Root rot happens when soil stays soggy for too long, suffocating the roots. A smart sensor only triggers watering when the soil is properly dry, making overwatering almost impossible.
- Stops Under-Watering: No more crispy, brown leaves because you got busy and forgot. The sensor is your plant’s 24/7 advocate, asking for a drink the moment it’s needed.
- Gives You Perfect Consistency: Plants thrive on routine. This system provides the same amount of water at the exact right moisture level, every single time. This is the kind of consistency that leads to real, visible growth.
- Total Peace of Mind (Vacation Mode!): This is my personal favorite. I can go away for a week and not have to bribe a neighbor to come over. I just check my phone, see the soil moisture levels, and know the system is handling it.
This setup takes the guesswork out of plant care. It lets you enjoy the beauty of your plants without the constant low-level anxiety of keeping them alive.
Your Smart Watering “Shopping List”
Before we get to the “how-to,” let’s talk about the gear. Getting the right pieces is half the battle. After five years of testing, I’ve found you don’t need the most expensive gear, but you do need components that can “talk” to each other.
The Core Components
You need three key things to make this work.
1. The Smart Moisture Sensor
This is the “trigger.” It lives in your plant’s soil and reports the moisture level.
- What to look for: The most important feature is Wi-Fi connectivity. It needs to connect to your home network to send alerts.
- Compatibility: Look for sensors that explicitly mention IFTTT or Amazon Alexa compatibility. Common brands like Ecowitt, or many generic “Tuya” or “Smart Life” app sensors, work well.
- My Experience: I started with Bluetooth sensors, but they were useless unless I was standing right next to the plant. A Wi-Fi sensor is the only way to go for true automation.
2. The Watering Device
This is what delivers the water. You have two main paths here.
- Path A: A “Dumb” Pump: This is just a basic, small electric water pump (many are USB-powered). It has no “smart” features. It just turns on when it gets power and turns off when it doesn’t. This is my preferred method because it’s cheap and reliable.
- Path B: A “Smart” Irrigation Controller: These are often sold as “smart watering systems” and may come with a pump and tubing included. They connect to Wi-Fi on their own. They can be slick, but make sure they integrate with Alexa or IFTTT.
3. The “Brain” (Your Automation Platform)
This is the service that connects your sensor and your pump. It follows the rules you set. We’ll be focusing on the two most popular:
- IFTTT (If This Then That): A powerful web service built to connect different apps and devices.
- Amazon Alexa: More than just a speaker; the “Routines” feature is a simple and powerful automation tool.
The Secret Weapon: The Smart Plug
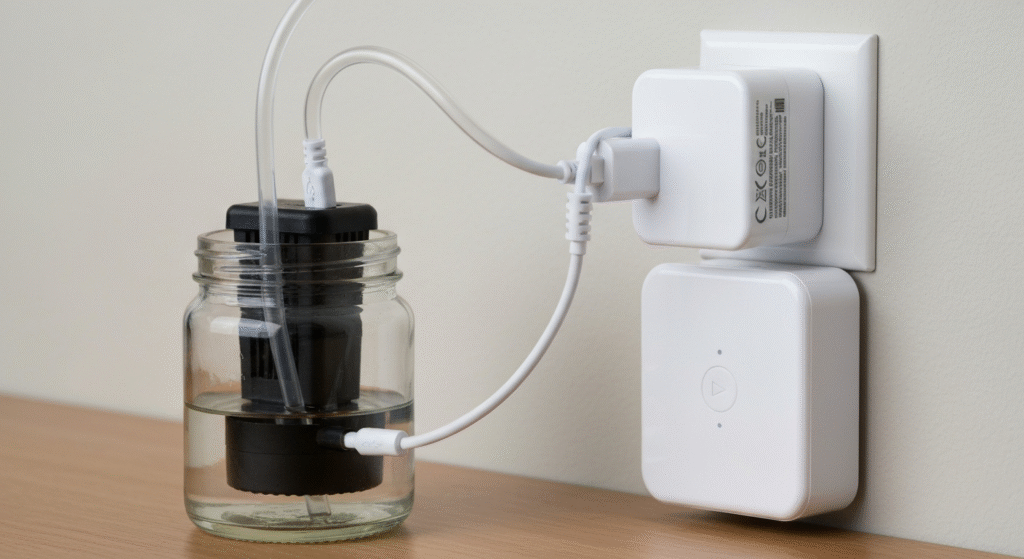
This little device is the key to the whole system, especially if you use a “dumb” pump (Path A).
A smart plug goes between your wall outlet and your pump’s power cord. On its own, it just lets you turn the outlet on or off with your phone. But when you link it to your “brain” (Alexa or IFTTT), it becomes the bridge.
Here’s the logic:
- Your sensor tells Alexa, “I’m dry!”
- Alexa tells your Smart Plug, “Turn on!”
- The Smart Plug turns on, sending power to your “dumb” pump.
- The pump runs, and the plant gets watered.
This is the component most people miss. You don’t need a fancy, expensive “smart pump.” A $10 smart plug and a $15 USB pump do the exact same job, often more reliably.
My Go-To Gear Setup
After years of mixing and matching, this is the kind of setup I find to be the most reliable and budget-friendly. This isn’t a formal lab test, just what’s worked consistently for me.
| Component | What I Look For | Why I Like It |
| Moisture Sensor | Wi-Fi enabled, IFTTT/Alexa compatible (e.g., Ecowitt sensor with gateway) | The Wi-Fi is non-negotiable for automation. I need it to talk to the cloud so IFTTT or Alexa can see it. |
| Water Pump | A simple 5V USB-powered fountain pump. | It’s cheap, quiet, and runs on any standard USB charger. It’s “dumb,” which is perfect. |
| Smart Plug | Any Wi-Fi plug compatible with Alexa or IFTTT (e.g., Kasa, Wyze, Amazon Smart Plug) | This is the magic link. It’s reliable, and I have them all over my house anyway. |
| Tubing & Drippers | 1/4″ vinyl tubing and simple drip emitters. | This lets me run a line from a central water reservoir (a large jug) to multiple plants. |
With these pieces, you have a flexible, powerful system ready to be automated.
How It All Works Together (The Big Picture)
Before we dive into clicking buttons, let’s get a clear mental model of what we’re building. No matter which platform you use (IFTTT or Alexa), the logic is the same.
You are setting up a chain reaction.
- The Trigger: Your Smart Sensor is always watching the soil. When the moisture drops below a level you set (e.g., 20%), it sends an alert to the internet.
- The Brain: IFTTT or Alexa is always listening for that specific alert. When it “hears” the “I’m dry!” signal from your sensor, it springs into action.
- The Action: The “Brain” immediately sends a command to your Smart Plug.
- The Result: The Smart Plug turns ON. This sends power to your Pump, which starts moving water from your reservoir, through the tubes, and into your plant’s pot.
But there’s a second, equally important automation you must build: The “Stop” command.
If you only build the “Turn On” rule, the pump will run forever. It will water until the sensor reads “wet,” but by then the soil is a swamp, and the pump just keeps going.
You must create a second rule that turns the pump OFF. We’ll cover two ways to do this:
- Time-Based: “Turn on the pump, wait 5 minutes, then turn it off.” (This is my preferred, most reliable method).
- Sensor-Based: “Turn on the pump. Then, when the sensor reads ‘WET’ (e.g., 60%), turn the pump off.” (This can be tricky, as sensors can be slow to update).
Now, let’s build it.
Method 1: Using IFTTT (If This Then That)
IFTTT is fantastic if your sensor brand and your smart plug brand are different and don’t natively talk to each other. IFTTT acts as the universal translator. It’s how I first got my Ecowitt sensor to talk to my Kasa smart plug.
When to Use IFTTT
- Pros:
- Incredible Compatibility: Connects thousands of services that otherwise wouldn’t work together.
- Powerful Logic: You can add extra steps and filters (e.g., “Only water if it’s after 8 AM”).
- Cons:
- Can Have a Delay: Since it’s a cloud service, there can be a lag of a few minutes between the sensor trigger and the pump action.
- Subscription Model: The free plan is limited (only 2 custom “Applets”). You’ll likely need the Pro plan to build the “On” and “Off” automations.
Step-by-Step Guide to Connect via IFTTT
First, make sure you have an account on IFTTT (which stands for “If This Then That”) and that you’ve connected both your sensor’s service and your smart plug’s service (e.g., “Ecowitt” and “Kasa”).
We’ll create two separate “Applets” (automations).
Step 1: Create Your “Turn On” Applet
This Applet says, “IF the sensor is dry, THEN turn on the smart plug.”
- On the IFTTT homepage, click “Create” in the top-right.
- For the “If This” (The Trigger):
- Click the “Add” button.
- Search for your sensor’s service (e.g., “Ecowitt” or “Smart Life”).
- Choose the specific trigger. This is the most important part. You’re looking for something like “Soil moisture drops below” or “Sensor alert.”
- Select your sensor device and set the threshold. For example, I set my leafy plants to trigger when moisture drops below 25%.
- Click “Create trigger.”
- For the “Then That” (The Action):
- Click the “Add” button.
- Search for your smart plug’s service (e.g., “Kasa,” “Wyze,” “Smart Life”).
- Choose the action “Turn on.”
- Select the specific smart plug your pump is connected to.
- Click “Create action.”
- Click “Continue” and then “Finish.” Give your Applet a clear name, like “Plant Pump ON.”
Step 2: Create Your “Turn Off” Applet (The CRUCIAL Step)
You have two choices here. I’ll cover my favorite, the time-based method, first.
Method A: Time-Based (My Recommendation)
This Applet says, “IF the pump just turned on, THEN turn it off after 5 minutes.” This requires a “delay” or “timer” service, which isn’t always available.
A much simpler approach is to make a second Applet that triggers when the soil is wet.
Method B: Sensor-Based (The Standard Way)
This Applet says, “IF the sensor is wet, THEN turn off the smart plug.”
- Click “Create” again.
- For the “If This” (The Trigger):
- Click “Add” and select your sensor service again (e.g., “Ecowitt”).
- This time, choose the trigger “Soil moisture rises above.”
- Select your sensor and set a “wet” threshold. I usually set mine to 60% or 70%. This gives a good buffer.
- Click “Create trigger.”
- For the “Then That” (The Action):
- Click “Add” and select your smart plug service (e.g., “Kasa”).
- Choose the action “Turn off.”
- Select the same smart plug your pump is on.
- Click “Create action.”
- Click “Continue” and “Finish.” Name it “Plant Pump OFF.”
My Personal Experience: I have to be honest. The first time I set this up, I only made the “Turn On” Applet. I was so excited it worked that I walked away. An hour later, I came back to a complete swamp. The pump had emptied an entire liter of water into one tiny pothos. Do not forget the “Turn Off” Applet!
Method 2: Using Alexa Routines
If your smart sensor and your smart plug (or smart pump) are both compatible with Amazon Alexa, this method is often faster, more reliable, and completely free. This is the system I use most of the time now.
When to Use Alexa
- Pros:
- Fast & Reliable: Routines usually run locally or very quickly from Amazon’s cloud. The delay is minimal.
- All-in-One App: If you already use Alexa, all your devices are in one place.
- Free: No subscriptions needed to create many routines.
- “Wait” Command: Alexa has a built-in “Wait” action, which I love.
- Cons:
- Limited Compatibility: All your devices must be visible inside the Alexa app. If your sensor isn’t, this won’t work.
Step-by-Step Guide to Connect via Alexa
First, open your Alexa app. Go to “Devices” and make sure both your moisture sensor and your smart plug are listed and you can control them manually.
We will create one single Routine that handles both “On” and “Off.” This is much cleaner than IFTTT.
- Open the Alexa app and tap “More” in the bottom-right corner.
- Tap “Routines” and then the “+” icon to create a new one.
- Give it a Name: Tap “Enter routine name” and call it something clear, like “Water Living Room Fig.”
- For the “When” (The Trigger):
- Tap “When this happens.”
- Select “Smart Home.”
- Find and tap on your moisture sensor.
- Set the trigger. It will look something like: “Soil Moisture” -> “Drops below” -> “25%”.
- Tap “Next.” (Alexa may ask you to confirm the time frame, just leave it at 24/7).
- For the “Alexa Will” (The Actions):This is where we build the On-Wait-Off sequence.
- Tap “Add action.”
- Select “Smart Home.”
- Select “Plugs” (or whatever category your smart plug is in).
- Find your pump’s smart plug.
- Make sure “Power” is set to “On.” Tap “Next.”
- This is the key step: Tap “Add action” again.
- Scroll down and select “Wait.”
- Set the duration. This is how long you want the pump to run. You must test this. Start with something short, like 1 minute. You can adjust it later.
- Tap “Next.”
- Tap “Add action” one last time.
- Select “Smart Home” -> “Plugs” -> Your pump’s plug.
- This time, set “Power” to “Off.” Tap “Next.”
- Review and Save:Your final Routine should look like this:
- When: Soil moisture drops below 25%.
- Alexa Will:
- Turn Plant Pump On.
- Wait 1 minute.
- Turn Plant Pump Off.
- Tap “Save” in the top-right corner.
Now, go test it! You can manually trigger the Routine from the app to see if the pump runs for exactly one minute. Then, take the sensor out of the soil to let it air-dry. Once it drops below 25%, the automation should run all by itself.
I find this “Wait” method in Alexa to be far more reliable than the IFTTT sensor-based method. The sensor doesn’t have to report a “wet” value; the system just runs its known, timed cycle and stops. It’s predictable and safe.
IFTTT vs. Alexa: Which One Should You Choose?
Both platforms get the job done, but they are suited for different setups. I’ve used both extensively, and my choice always comes down to compatibility.
Here’s a quick comparison based on my experience:
| Feature | IFTTT | Alexa Routines |
| Best For | Connecting two different brands that don’t talk (e.g., Ecowitt sensor + Wyze plug). | Connecting devices that are all Alexa-compatible. |
| Ease of Use | A bit of a learning curve. Requires two Applets. | Very simple. One Routine handles the entire On-Wait-Off cycle. |
| Speed / Reliability | Can have a slight delay (minutes). Generally reliable. | Very fast (seconds). Extremely reliable, especially with the “Wait” command. |
| Cost | Free plan is very limited. You’ll likely need the Pro plan ($2-3/month). | 100% Free. |
| My Verdict | Use IFTTT as the powerful “Plan B” if your devices won’t both show up in the Alexa app. | This is my preferred method. If your gear works with Alexa, use this. It’s simpler, faster, and free. |
Common Problems and How to Fix Them (Troubleshooting)
I promise you, your first setup won’t be perfect. I’ve run into every problem imaginable. Here are the most common ones and how I fixed them.
Problem: “My pump runs forever!” or “It never turns on!”
- The Cause: This is almost always a mistake in your automation logic. You either forgot the “Turn Off” command, or your “On” and “Off” triggers are fighting each other.
- The Fix:
- On IFTTT: Double-check that you have two Applets: one for “On” and one for “Off.”
- On Alexa: Use the On-Wait-Off sequence inside a single Routine. This is the most foolproof method. Delete any other routines that might be controlling the same plug.
- Check Triggers: Make sure your “On” trigger (e.g.,
< 25%) and “Off” trigger (e.g.,> 60%) are not too close together. If you set “On” at< 30%and “Off” at> 35%, the sensor might “flutter” between them, causing the pump to turn on and off rapidly.
Problem: “My sensor says ‘Dry’ but the soil is a brick (or a swamp).”
- The Cause: Sensor placement and calibration are everything.
- The Fix:
- Placement: Don’t just jam the sensor in. You need to place the probes in the root zone—not too shallow (it’ll dry too fast) and not at the very bottom (it’ll stay wet). For a 6-inch pot, I aim for about 3-4 inches down.
- Calibration (The Finger Test): This is a manual process. Water your plant perfectly. Stick your finger in. It feels moist and good. Now, look at your sensor’s reading. Let’s say it reads “75%”. That is your new “wet” baseline. Now, wait a few days. The soil looks dry. The pot feels light. Your finger test says it’s time to water. Look at the reading. Let’s say it’s “28%”. That is your new “dry” trigger. Don’t trust the default numbers; trust your plant.
Problem: “The automation is very slow.”
- The Cause: This is usually a Wi-Fi or cloud lag problem.
- The Fix:
- Check Wi-Fi: Make sure your sensor, smart plug, and hub/gateway have a strong Wi-Fi signal. A weak signal means slow reporting.
- Blame IFTTT: If you’re on IFTTT, a delay of 2-5 minutes is not uncommon. It’s just the nature of the service.
- Switch to Alexa: As I mentioned, Alexa Routines tend to execute much faster. If your devices are compatible, switching will almost always solve a lag problem.
Problem: “My sensor or pump isn’t ‘smart’.”
- The Cause: You bought a component without Wi-Fi or automation compatibility.
- The Fix:
- For a “Dumb” Pump: This is the goal! Just plug it into a Smart Plug. The smart plug is what you will automate.
- For a “Dumb” Sensor: Unfortunately, you’re stuck. A sensor must have Wi-Fi (or a Wi-Fi gateway/hub) to send its data to the cloud. A simple Bluetooth-only or display-only sensor cannot be part of this system.
Frequently Asked Questions (FAQs)
Q1: Can I do this with Google Home?
Yes, but it’s more difficult. Google Home’s “Routines” are not as powerful as Alexa’s. They often lack the ability to use a sensor’s state (like “moisture below 20%”) as a trigger. This is one of the few areas where Alexa is the clear winner for smart home automation.
Q2: How long should I set the pump to run?
This is the most important question and it completely depends on your setup. It’s based on your pump’s flow rate, your tubing size, and your pot size. My method: set the “Wait” time in your Alexa Routine to 30 seconds. Run it. Check the soil. Not enough? Change it to 1 minute. Run it. Too much? Try 45 seconds. You have to dial it in manually for each plant, but once it’s set, it’s set for good.
Q3: Do I need a special pump?
Not at all. I use cheap $15 submersible fountain pumps designed for little desktop water features. The only thing that matters is that you can plug it into a smart plug.
Q4: Will this work for my outdoor garden?
Technically, yes, but the scale is different. You’d need outdoor-rated smart plugs and sensors (like the Ecowitt gateway with multiple sensors). Instead of a small pump, you’d connect your smart plug to a “smart irrigation controller” that opens a main water valve. The logic is the same, but the hardware is more heavy-duty.
Final Thoughts
Setting up your first automated watering system feels like a huge win. It’s the moment your smart home stops being a novelty and starts becoming a genuinely useful assistant. It takes a little tinkering, but the payoff is healthier, happier plants and one less thing on your daily to-do list.
My advice is to start simple. Pick one plant. Use the Alexa and smart plug method if you can. Get that one plant working perfectly. Learn how it responds. Once you’re confident, you can expand, running tubing from one pump to multiple plants and creating routines for each one. Good luck, and happy gardening!